Climbing Techniques
Whilst strength and flexibility play a key part in climbing, so does your technique! If you can improve your technique, you'll find a lot of the routes you try become much easier and you'll rely less on pure strength to get you to the top. In this guide I'll show you some of the most common techniques used in climbing and bouldering which will help you level up your technique and your overall skill.
Toe Hooks
First up are toe hooks. Some routes might require you lean right over or up high where doing so with just your hands becomes difficult.
This is where the toe hook technique might come in handy. Toe hooks are where you place the top part of your climbing shoe / toes up against or underneath one of the holds. When you do this, it allows you to place your weight on your opposite leg or hand / arm, whilst keeping your body tight and secure against that wall. It gives you the extra stability you need to reach up or over to the next hold.
The holds for a toe hook are usually quite big and will offer some sort of flat or curved edge where you can hook your toe in. However sometimes the holds aren't large and might only be a thin edge of a volume.
If you're struggling to reach a hold, try to see if a toe hook is available. Look at the holds, are they the right shape or depth? Try getting into position and see if your foot fits. If it does, see if it can take your weight by hooking in and leaning over to the next hold.

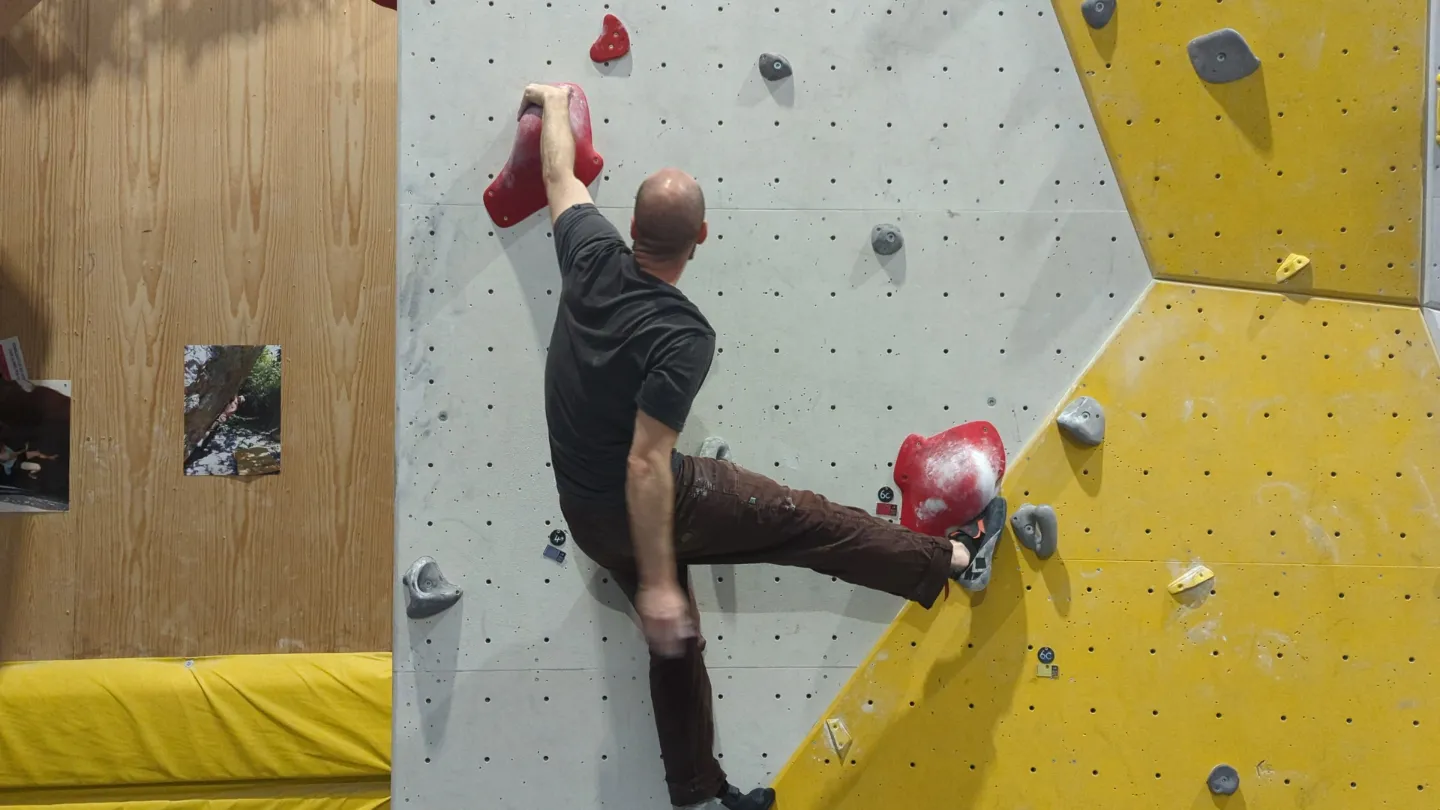
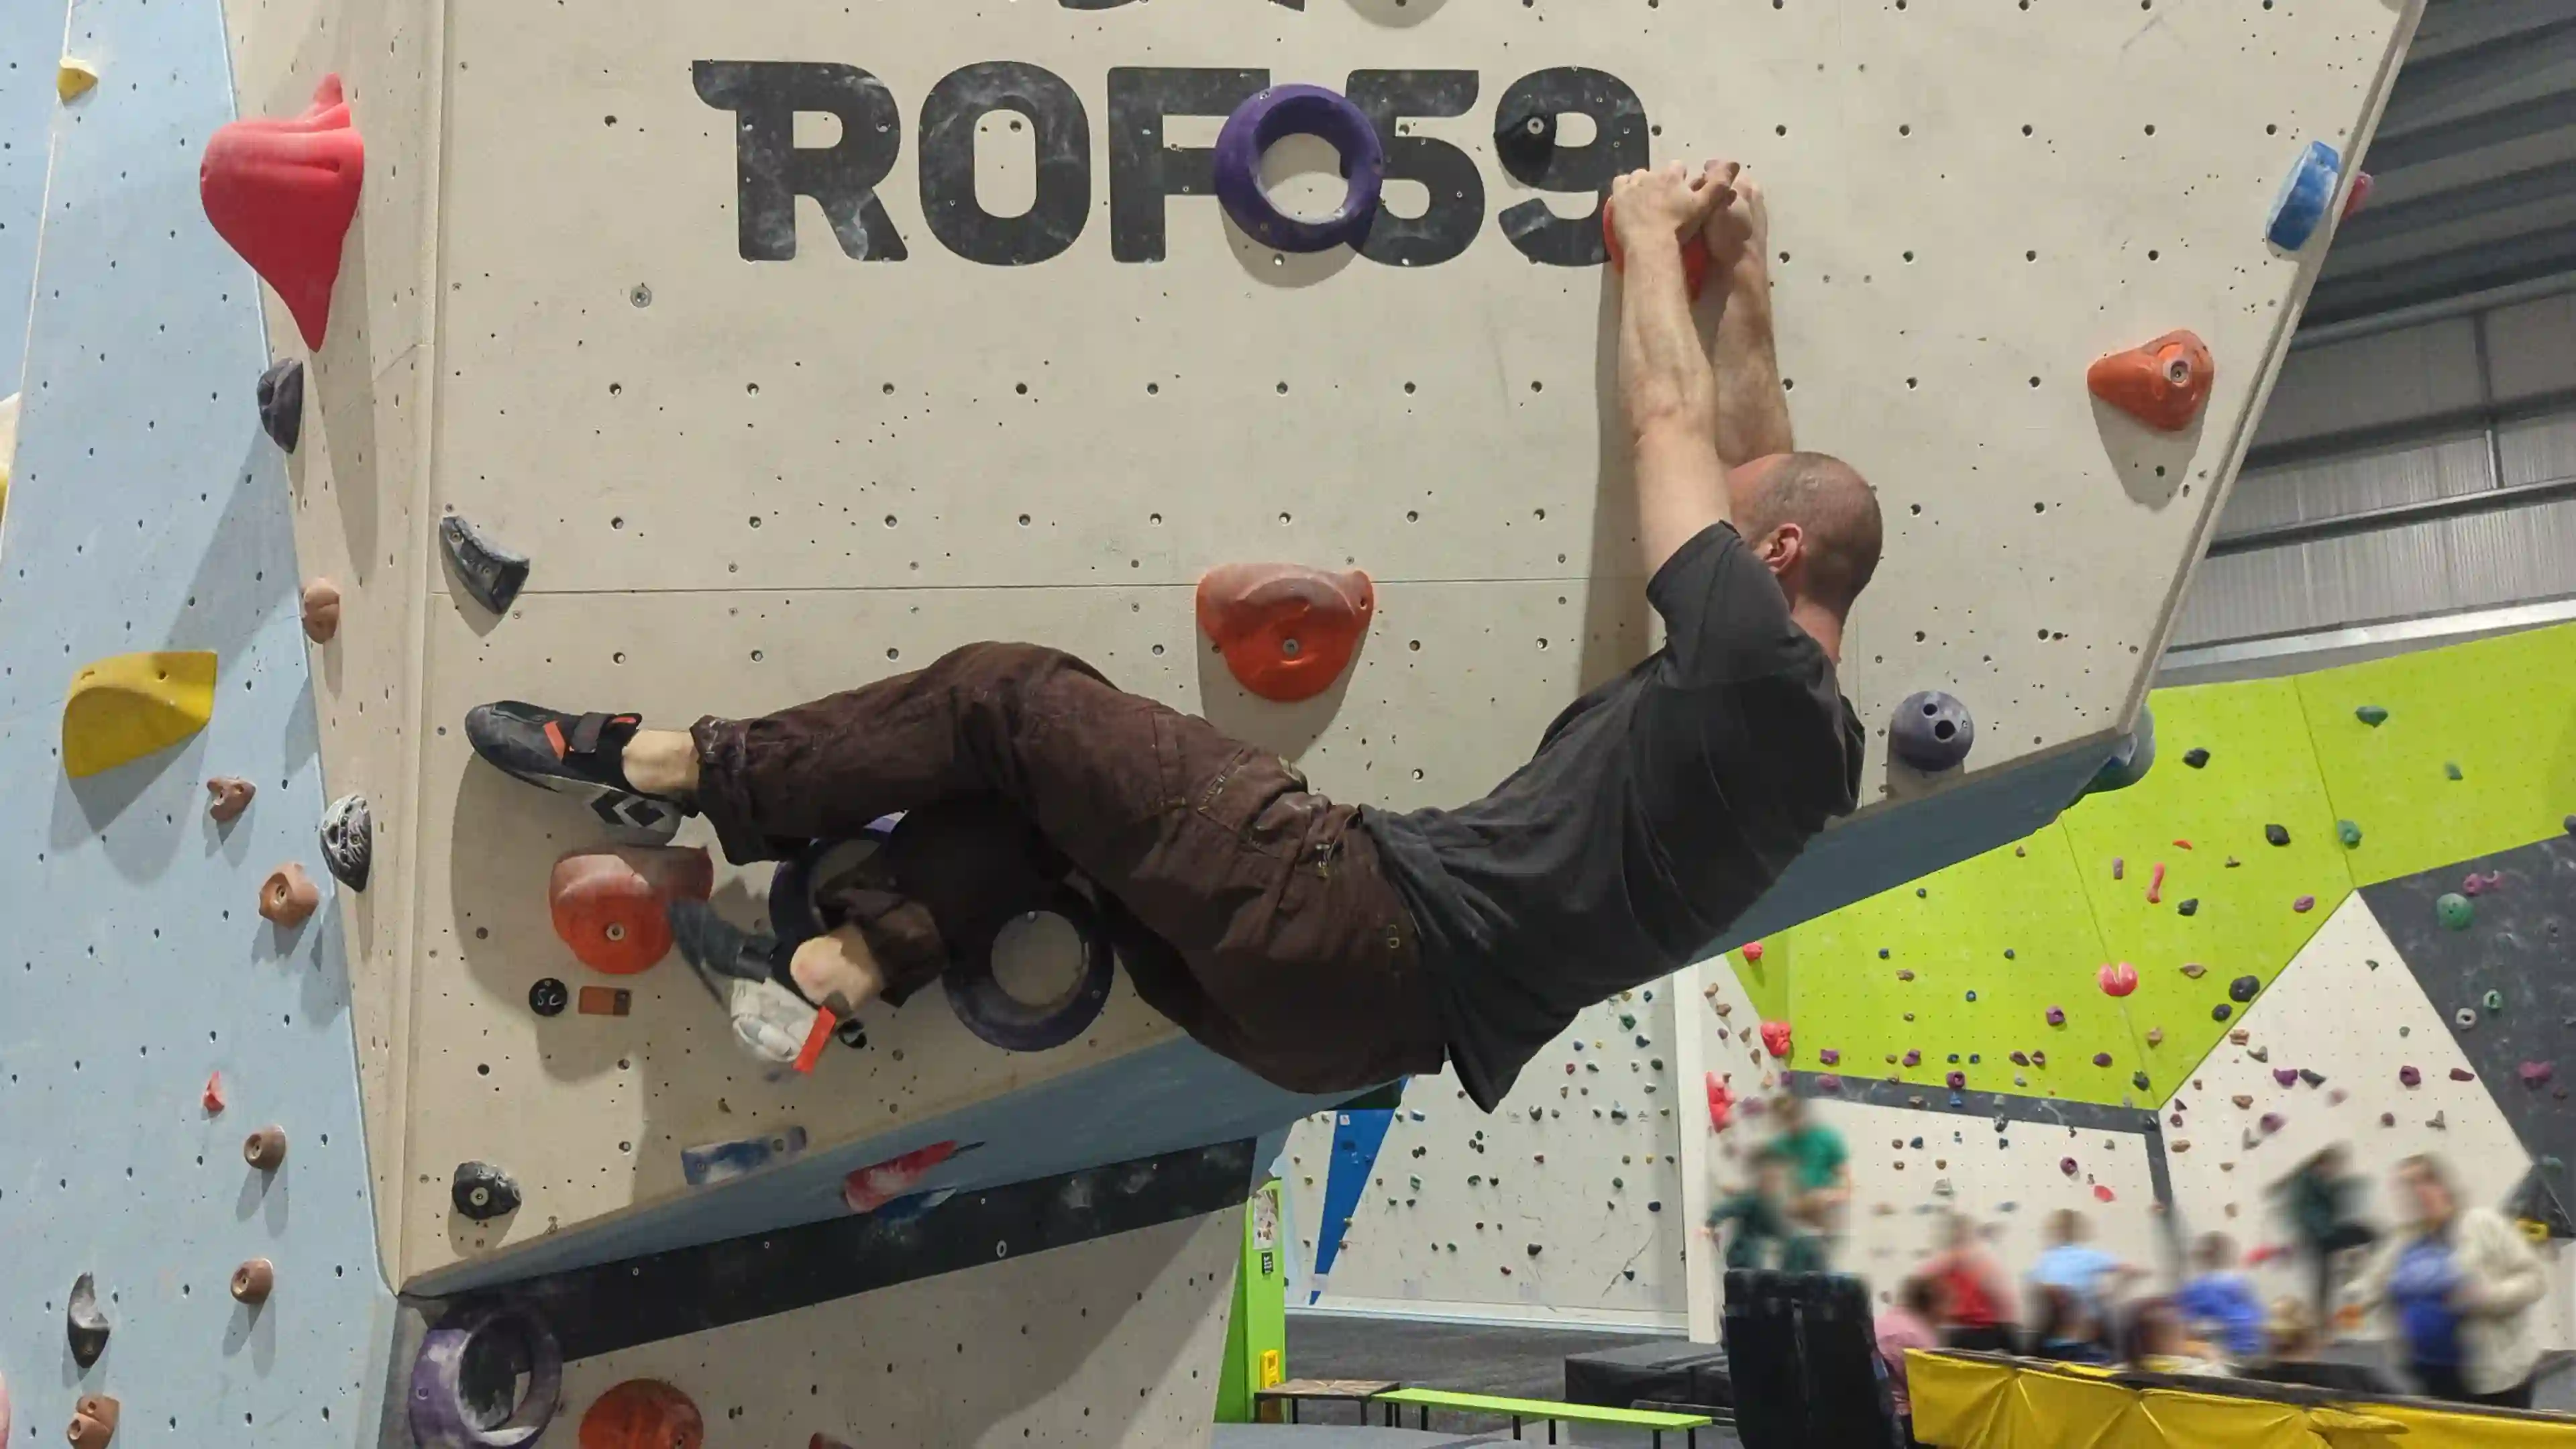
Video example of toe hook move / technique
This video shows a 6C route where the climber has to get his foot tucked into right side of the hold. Although not visible, the starting foothold is very small and you can only just get the edge of your big toe on it. This makes it much more difficult to simply just reach up and over to hold above.
By using the toe hook technique here, it allows him to take some strain off his hands and gives him more freedom to reach the hold hidden away on the left side of the wall. You can see that when the toe hook is in place. It allows him to reach over without falling off the wall.
Rock Overs
Have you ever tried a route where you're unable to reach the next hold and feel like you are on the wrong side and there are footholds that you've missed or just not using? Then a Rock Over might be the technique you need!
Rock Overs are when you place your foot on a hold, which is usually higher up and then lean over onto it (rock over) and then push your body up. It's similar to a pistol / one legged squat if you've ever seen or done one of them.
Rock overs are good move to get your body in a better position, they help you get higher up the wall and to also get your center of gravity over your feet. They also also help with conserving energy as they save you having to use a lot of grip strength trying to get higher up the wall.
When doing a rock over, try and get your foot as far over as possible and keep your body close to the wall too. If you can point your arm out to the side you intend to lean over too, this can help with balance and stability. Once you have a good footing, try to push your body up, by driving your weight down on the rocked over foot. If needs be you can use your opposite foot to smear up to wall for stability.
Video example of rock over move / technique
This video shows a climber on a 6B+ route. As you can see there is a nice wide and flat hold where he can place his right heel and then then his full foot onto. He then does the rock over technique, where he leans over to his right, with his right arm / extended to help with balance and places his weight over his right foot. He then pushes up with his right leg, using his left foot to smear up the wall to help with balance. This allows him to reach the higher holds.
Knee Drops
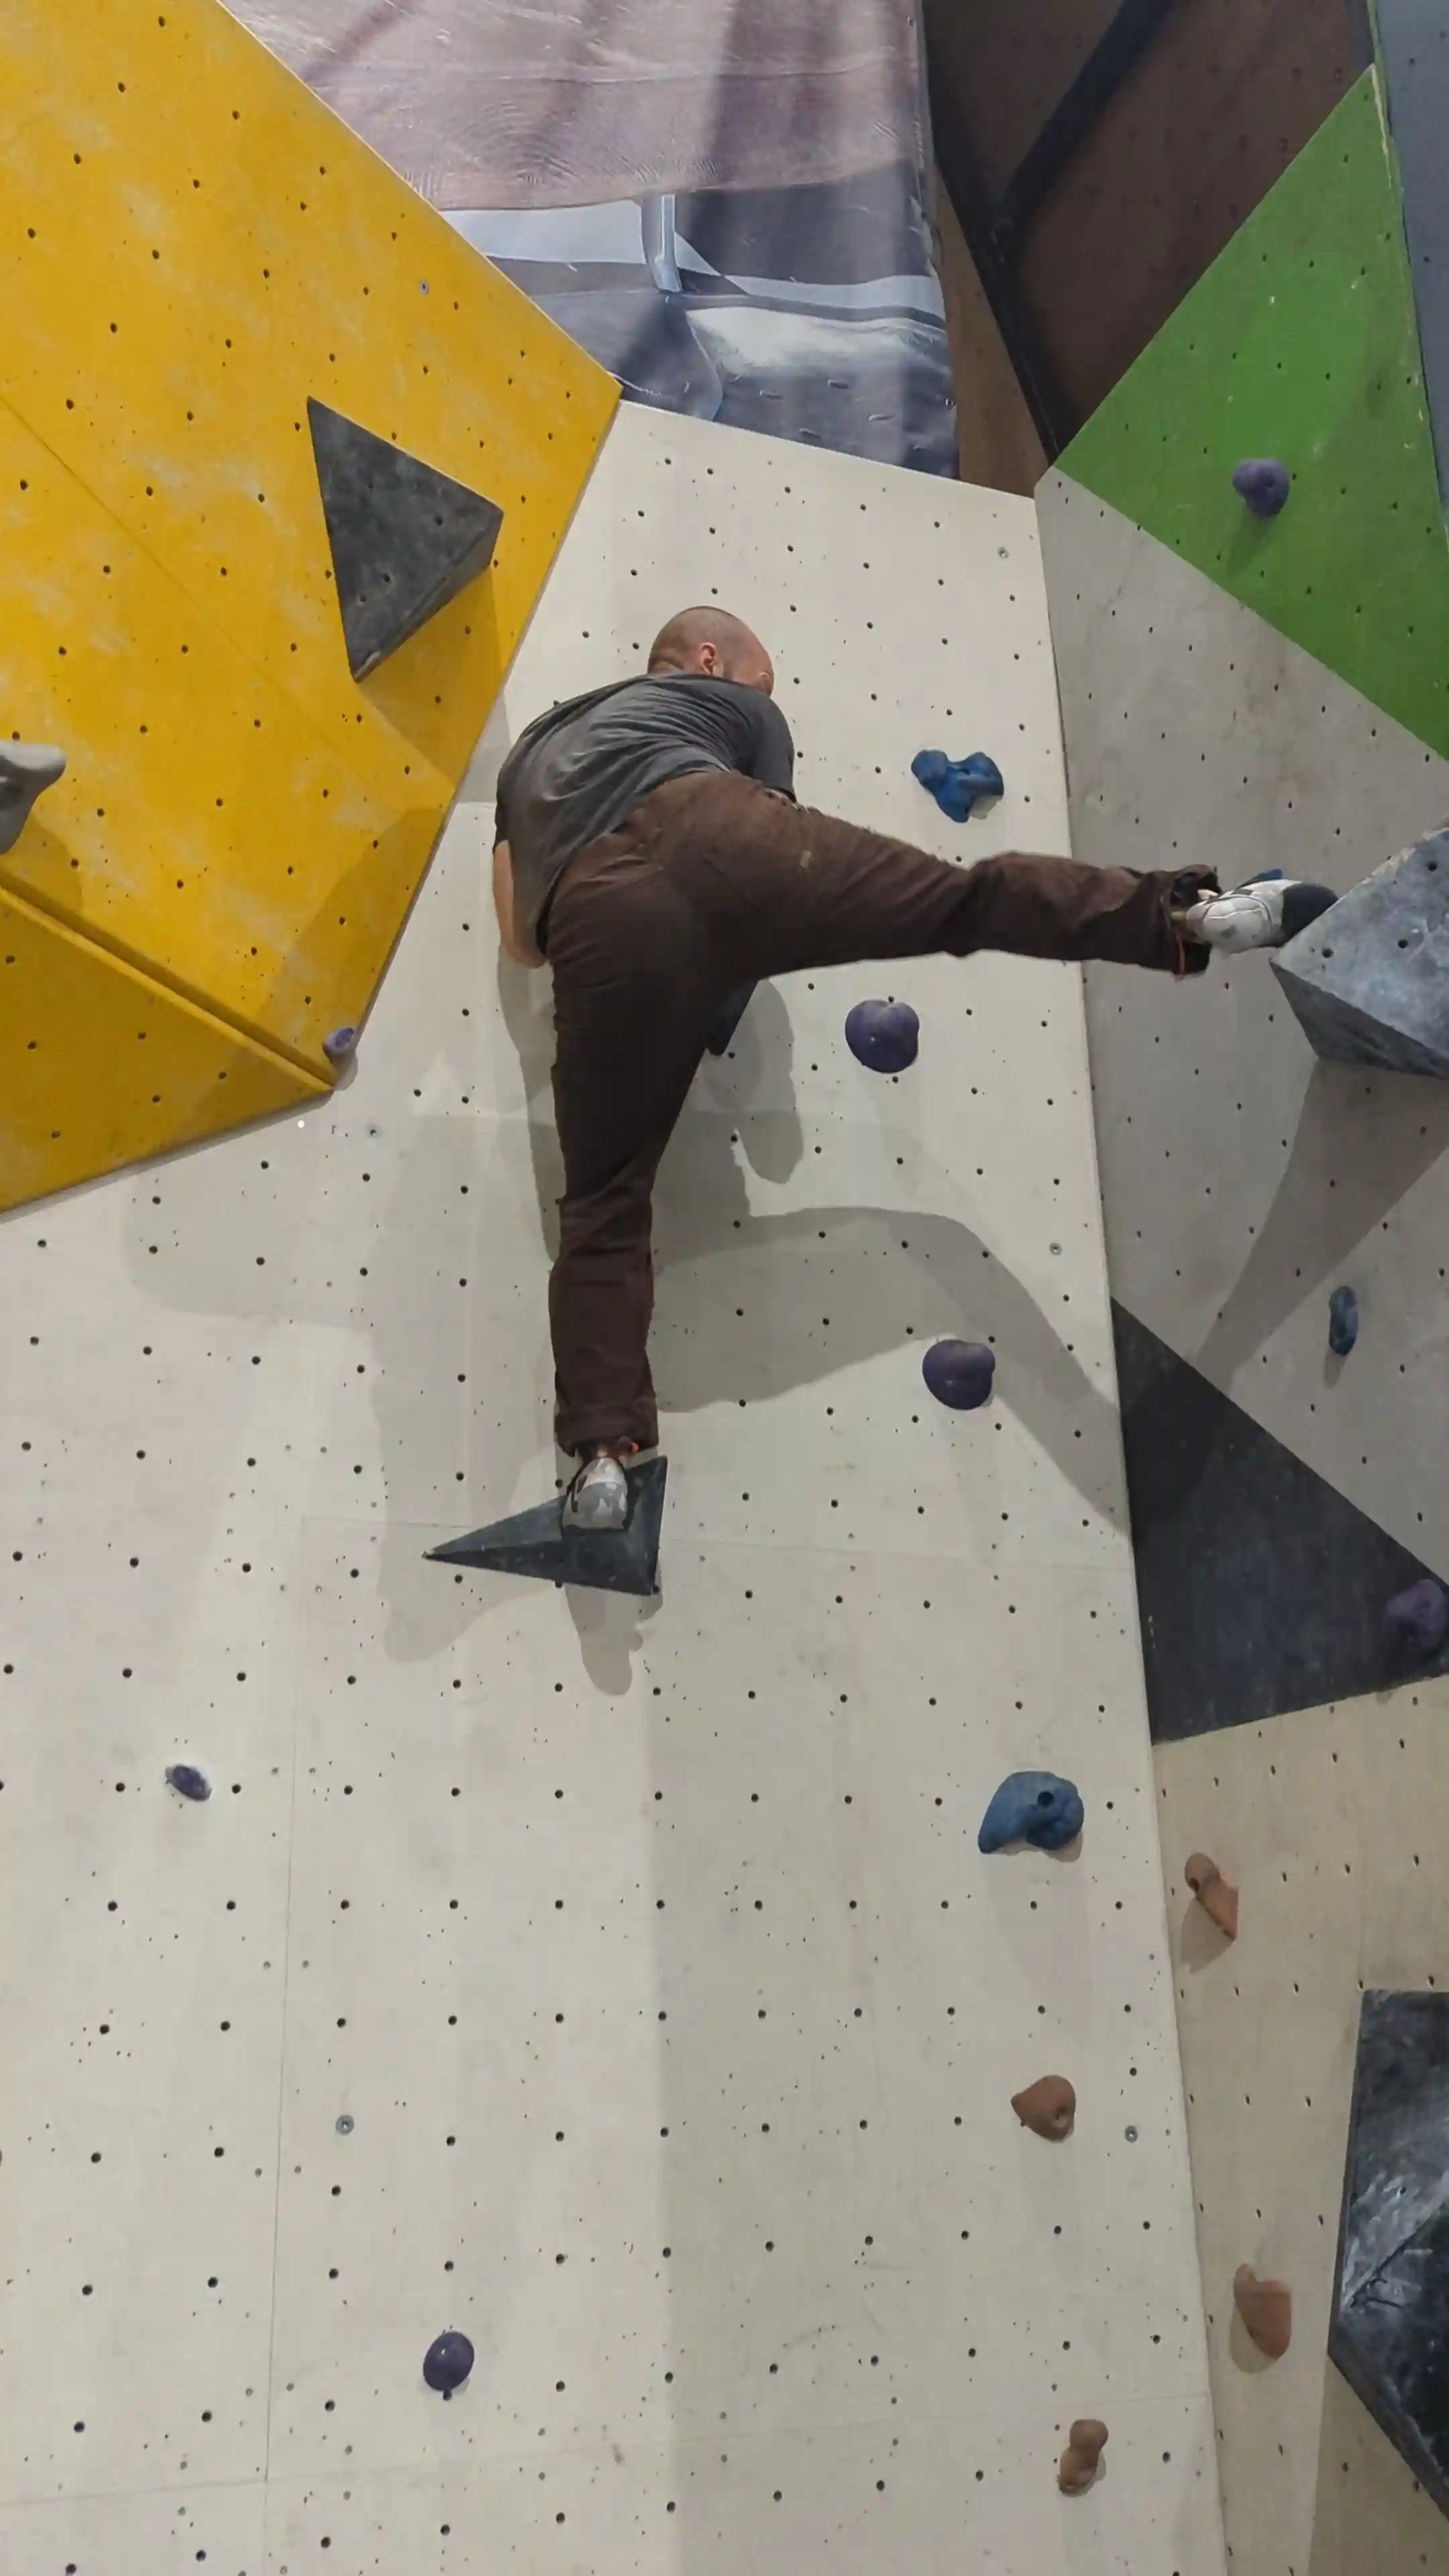
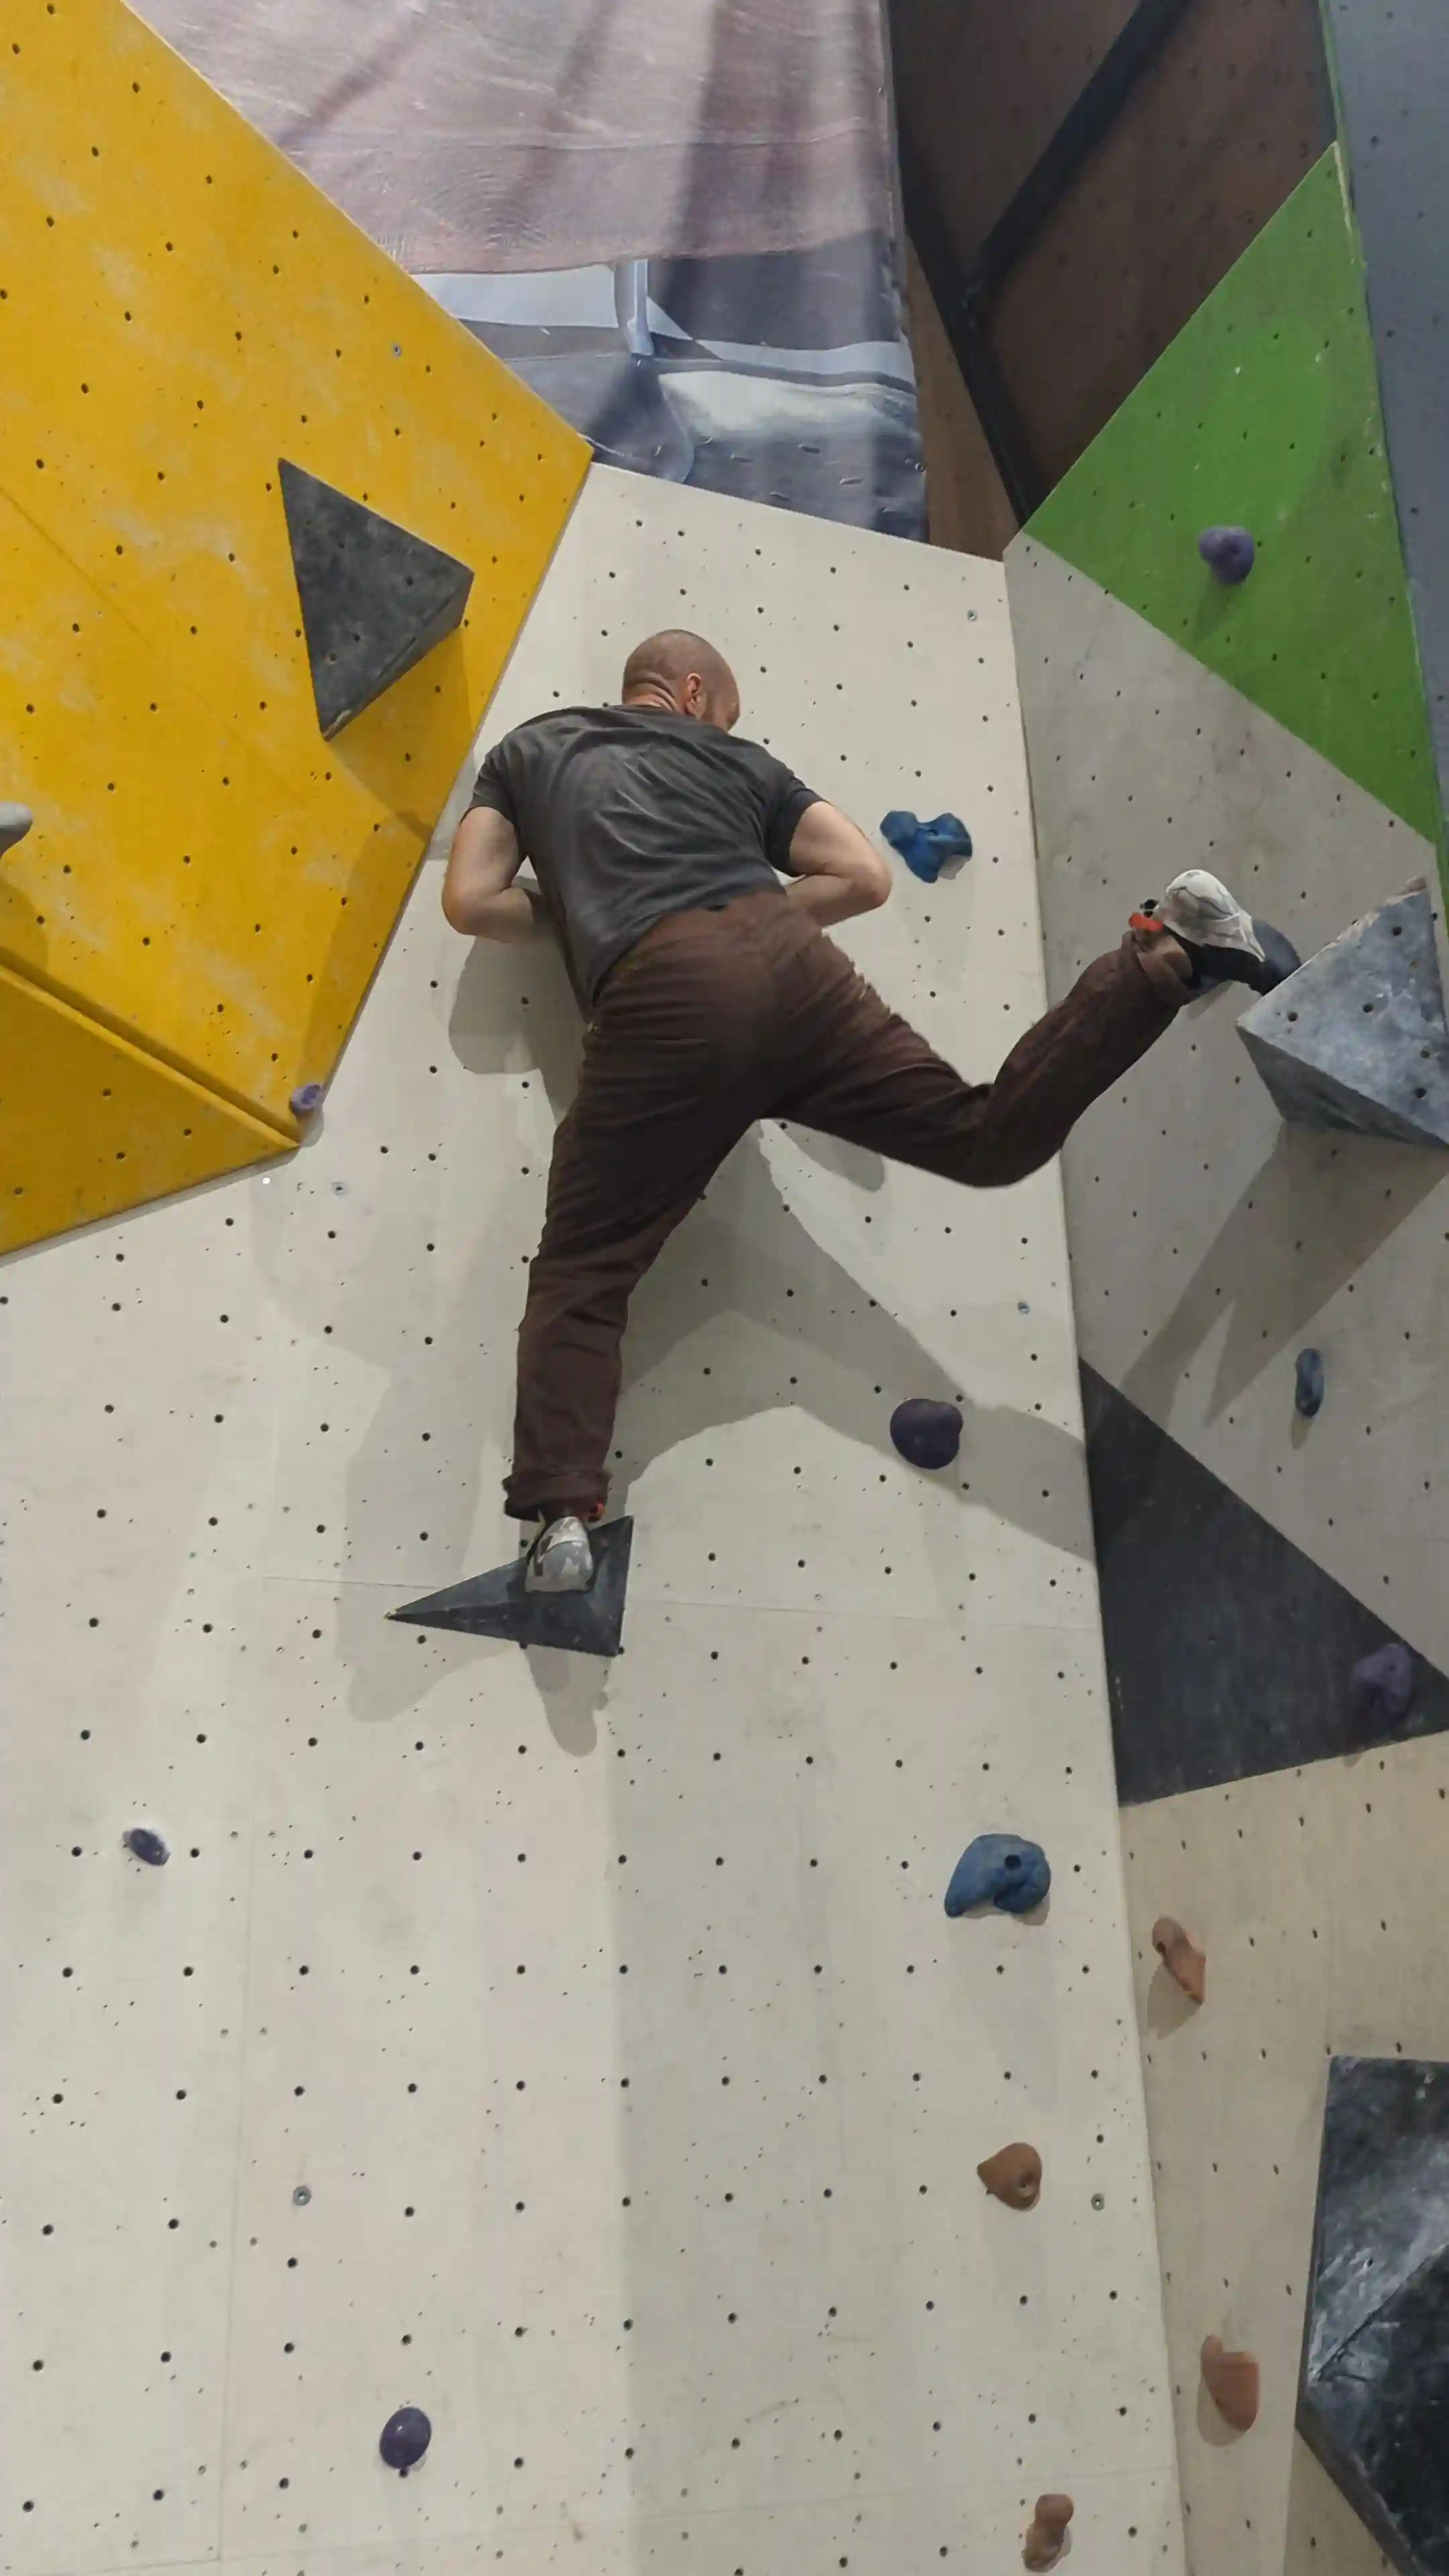
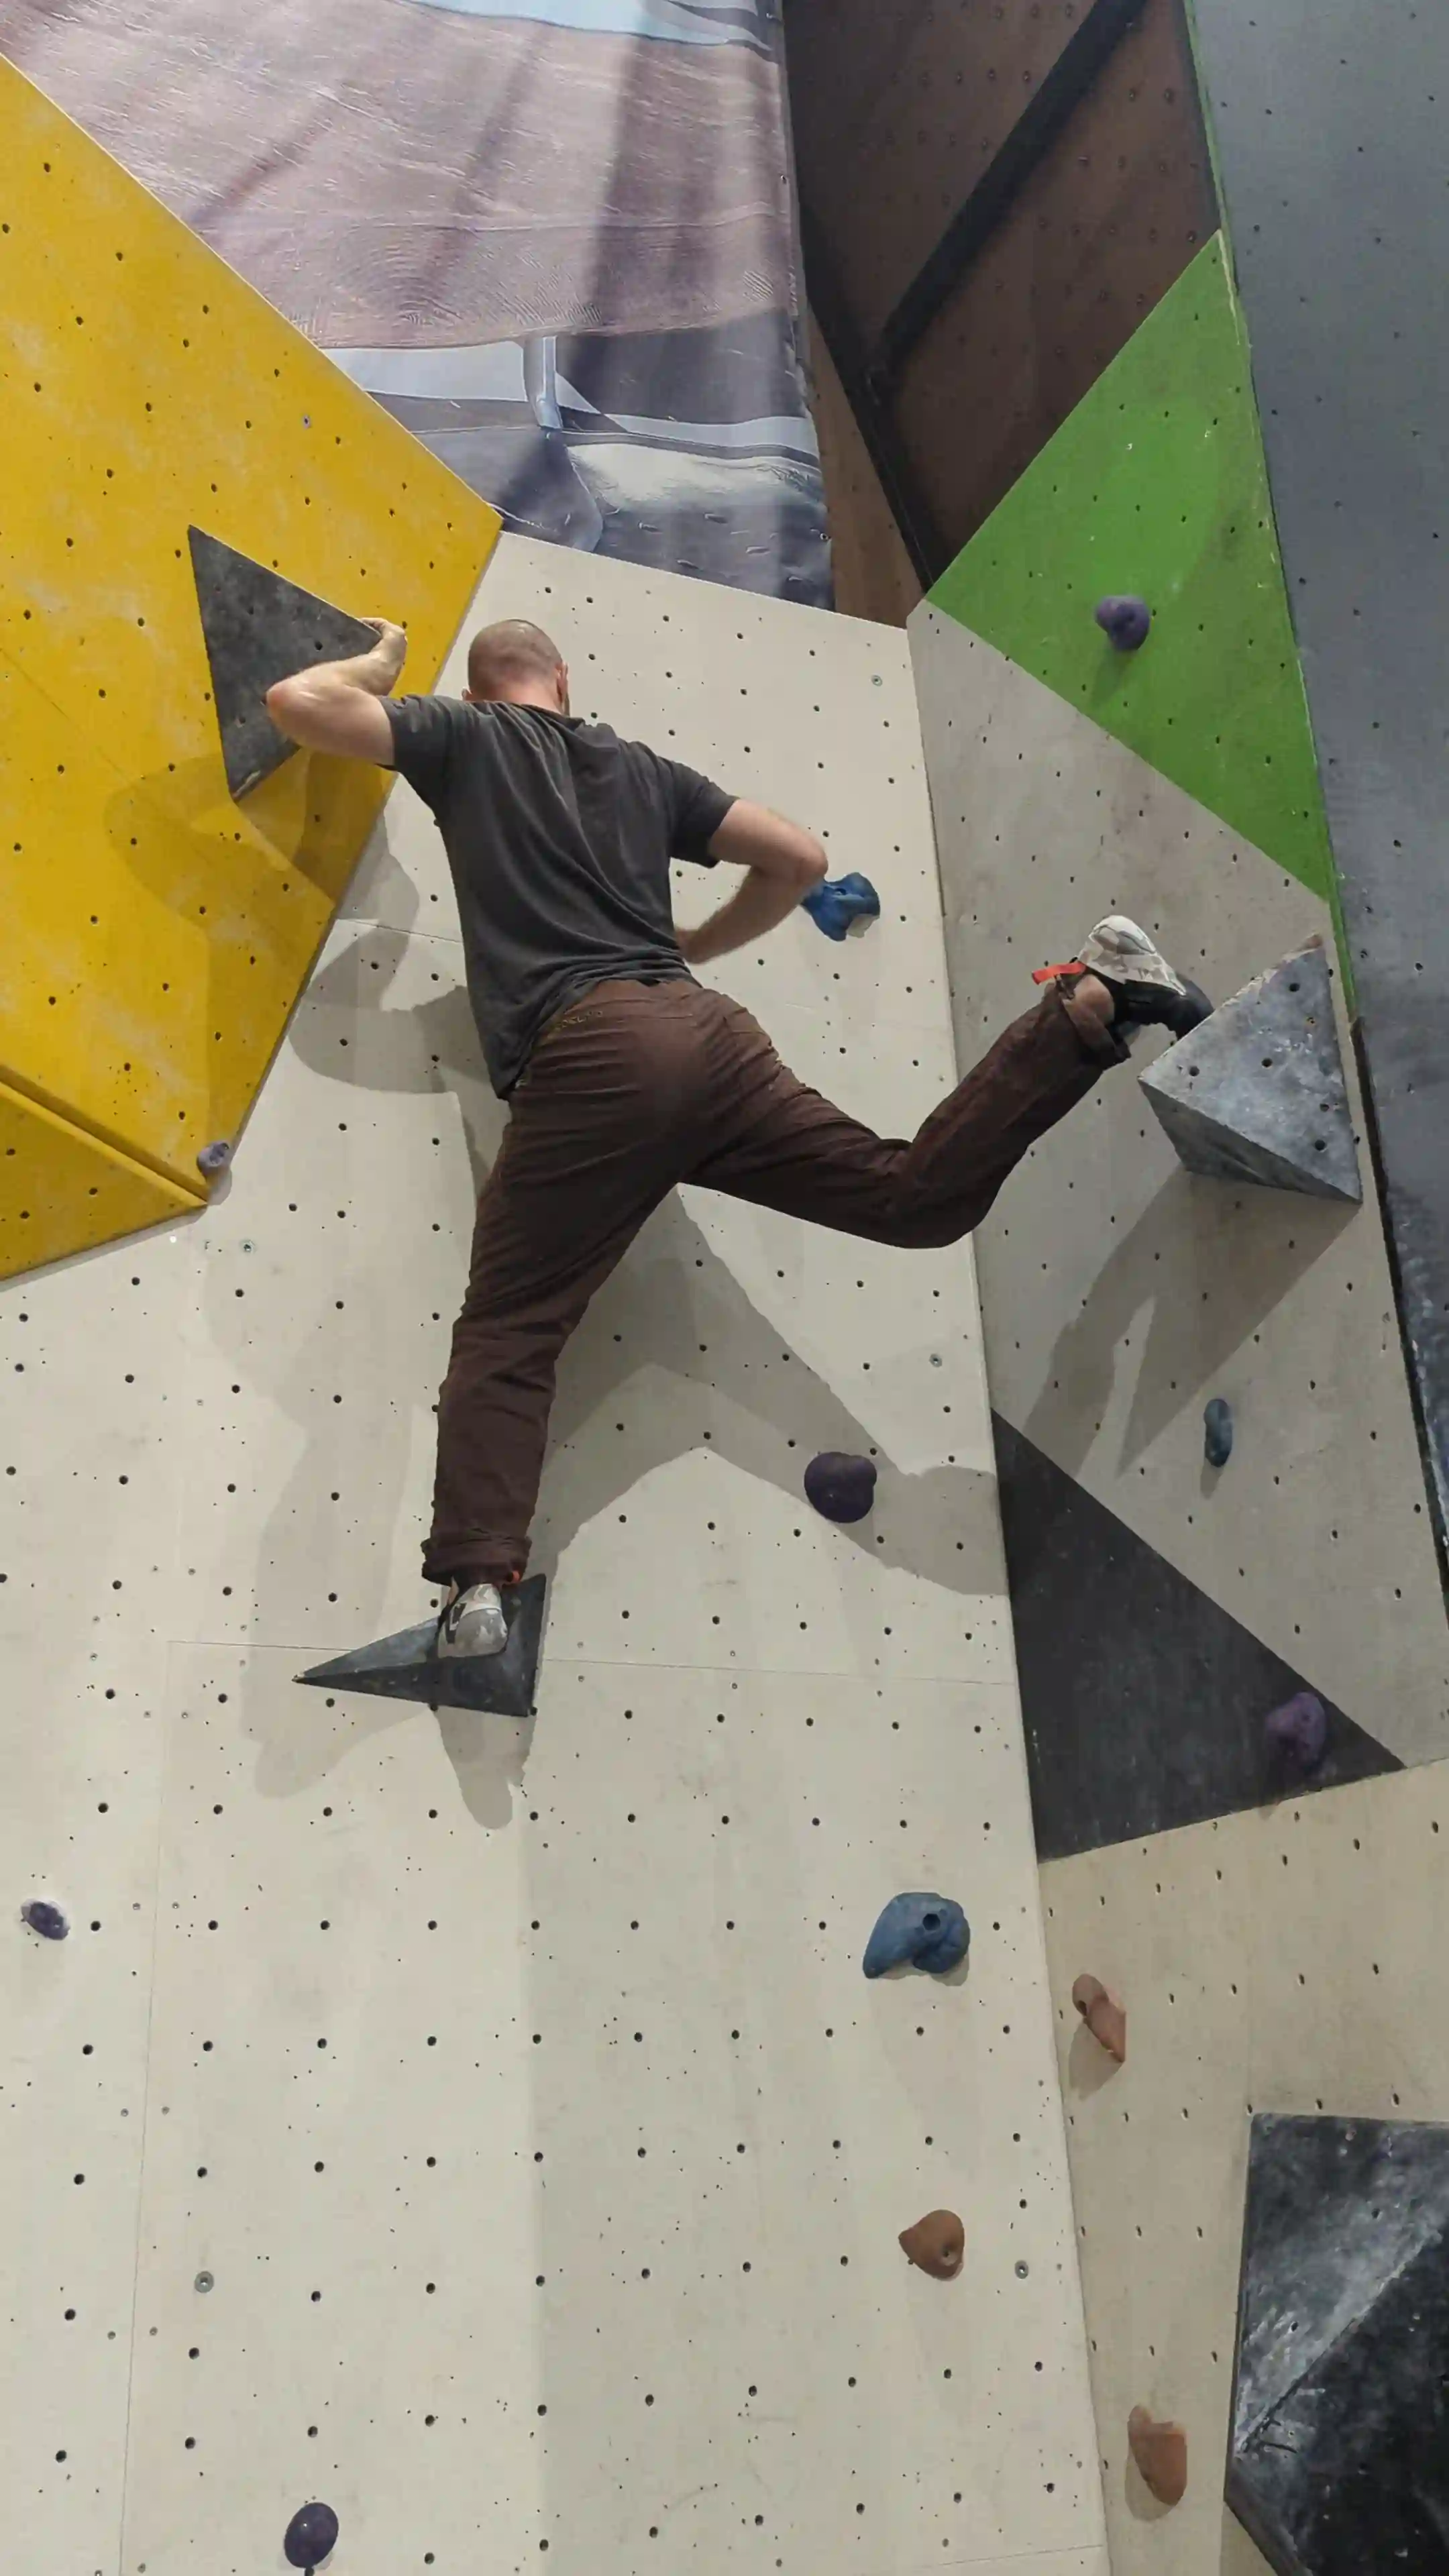
Knee drops are a good technique when you need to get your body to face the opposite direction. They can be achieved by placing the ball of your foot onto a hold and rotating your leg round to the direction you need to be in and also dropping your knee down at the same time.
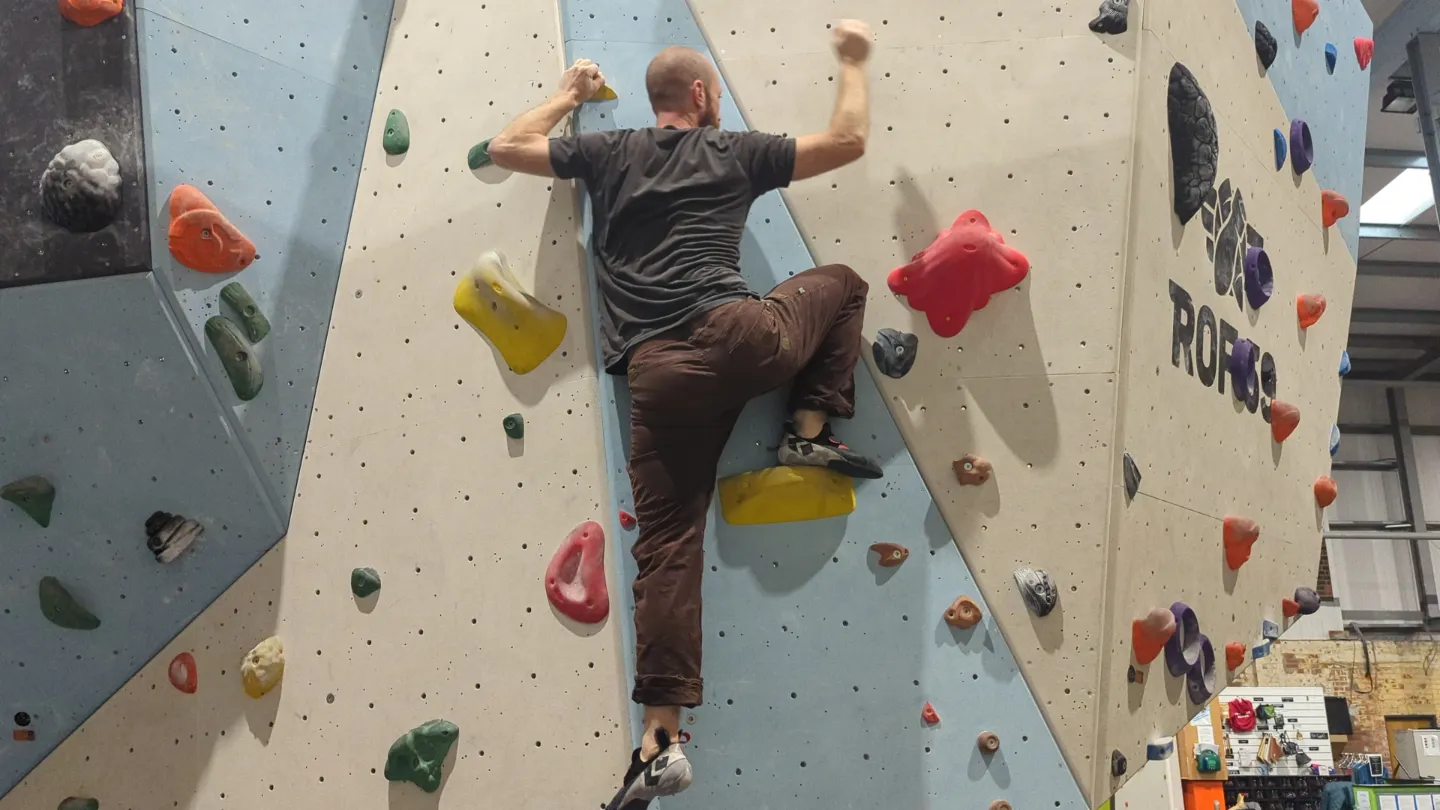
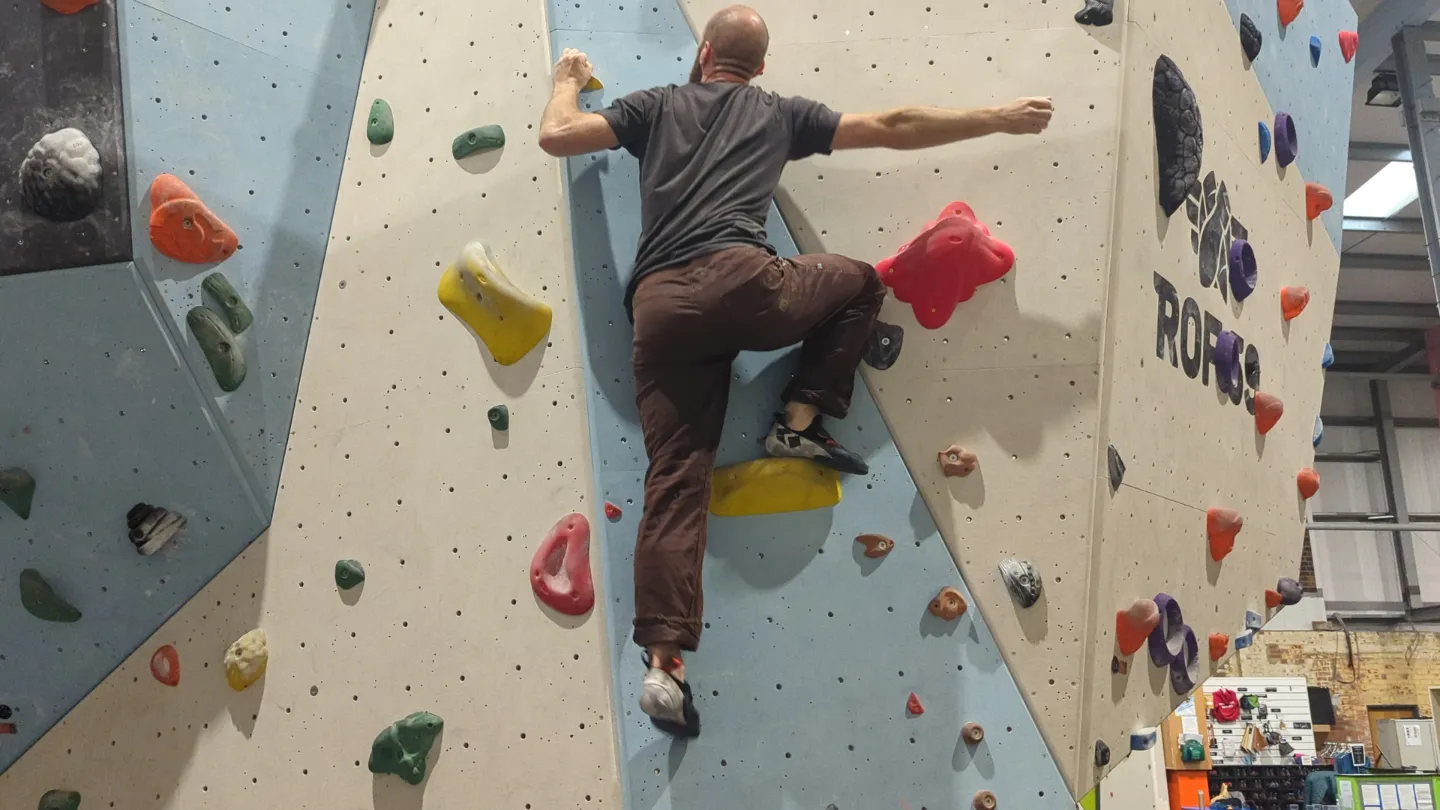
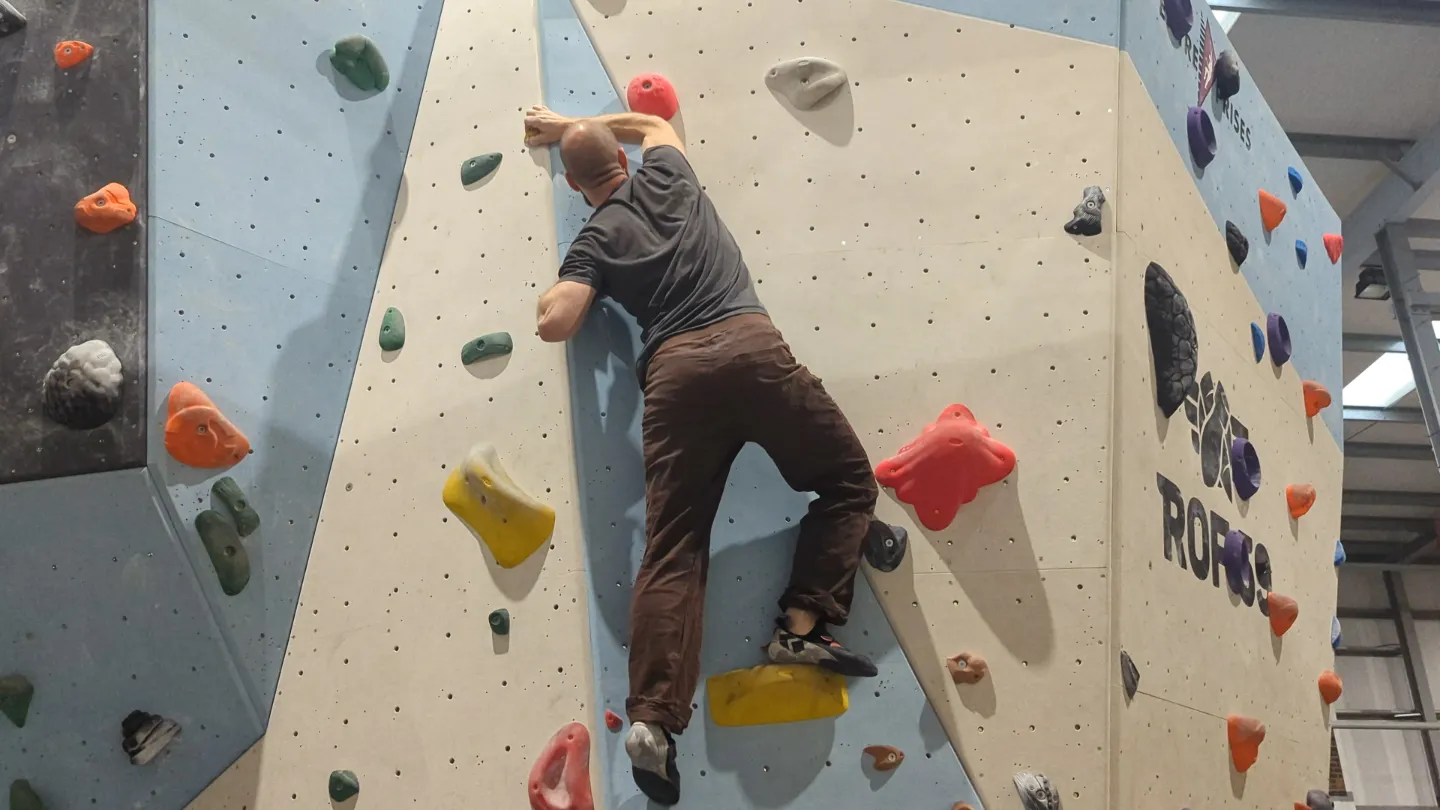
For example if you look at the first of the 4 images below you can see the climber extends his right leg over to the hold. If here were to stay in this position, the final hold just to the left of his head would be very awkward to reach. His body is facing to the opposite direction and it increases the chances of coming off from the wall.
Performing a knee drop here, allows the climber to shift his center of gravity onto his left foot and his direction towards the final hold.
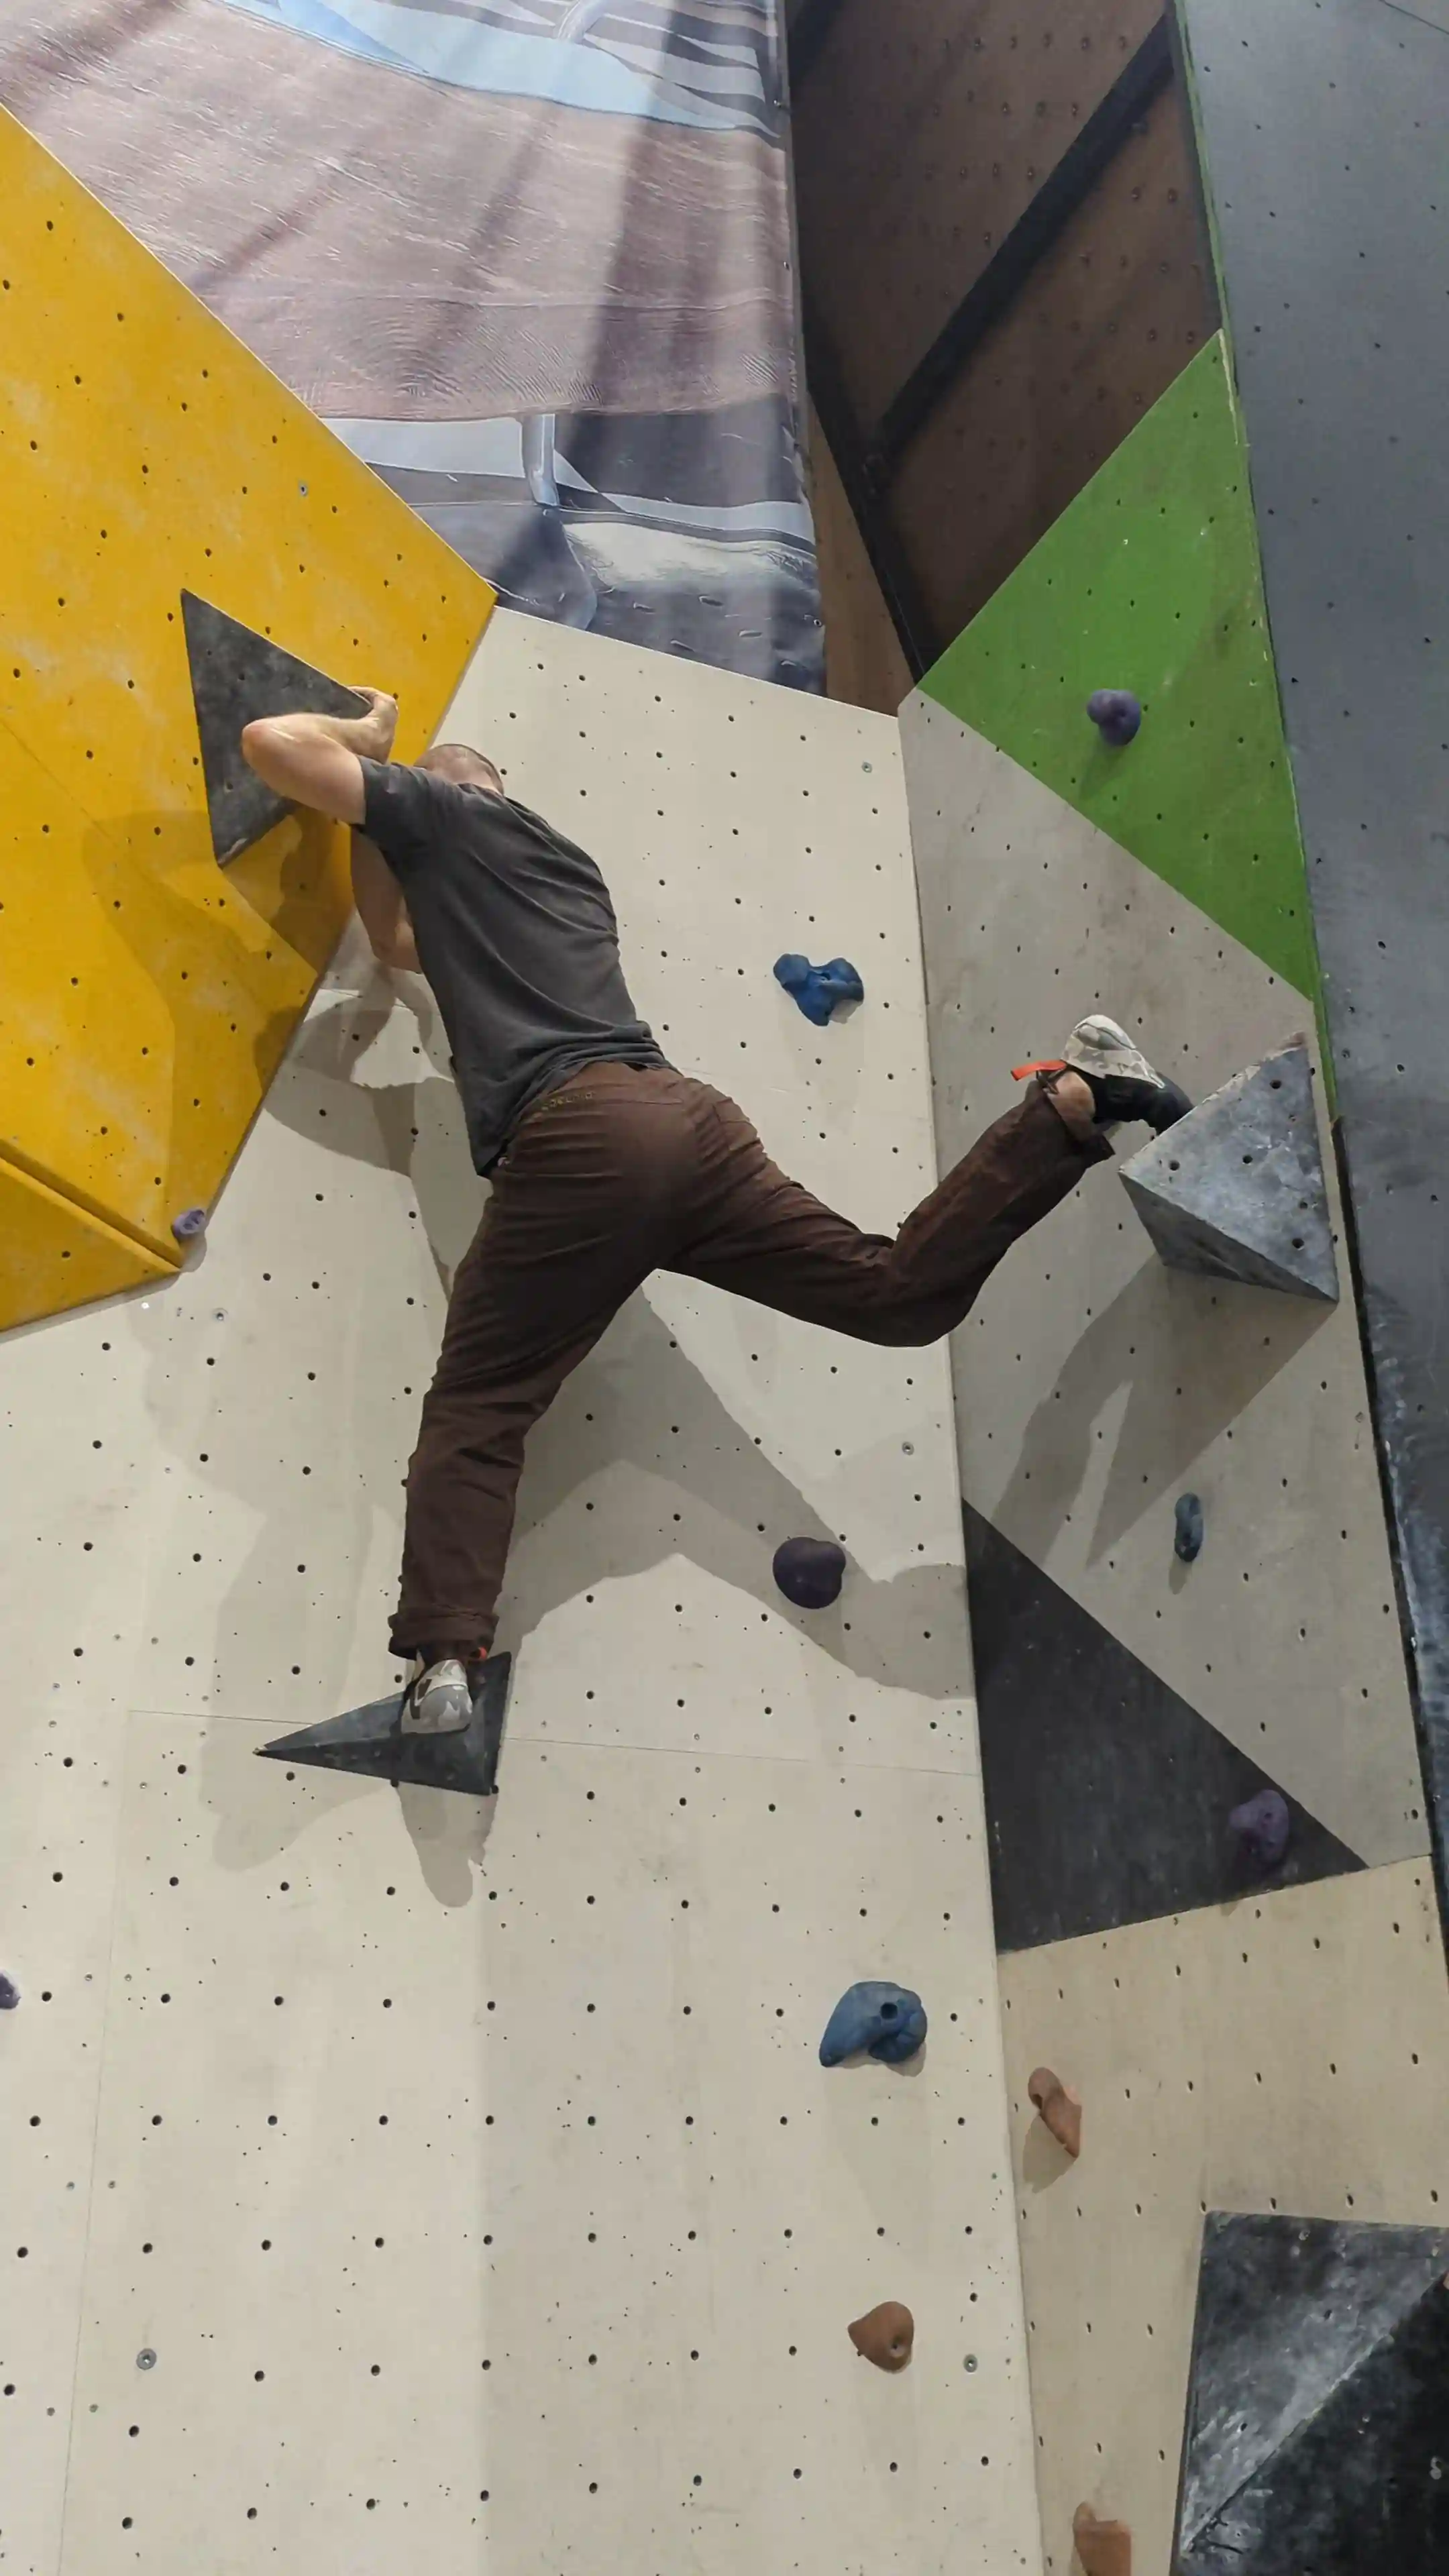
Video example of knee drop move / technique
This video shows a 6B route which is mostly volumes where the climber extends his right leg (knee facing the wall) and places the ball of his right foot on the volume. He then pivots / turns his foot 90 degrees to the right, which causes his knee to drop down. This allows him to position his body and arms towards the final hold, whilst having his weight under his left leg and supporting himself with his knee dropped right leg.
Heel Hooks
Heel hooks come in particularly handy when on an overhang or a steep wall. They allow you to take some of the strain off your hands and provide stability by shifting the weight from your hands over to your feet, allowing you reach the next hold above.
Typically you'll use a heel hook on an overhang or steep sections. When you're closer to being horizontal, rather than vertical, sometimes you won't be able to use your feet to press down on a foothold, instead look for a way to rest your heel on top of the hold instead.
You can do a heel hook on both a flat (horizontal) hold as well as a vertical one too. Basically anywhere you can fit your heel in which allows you to push down onto or pull against.
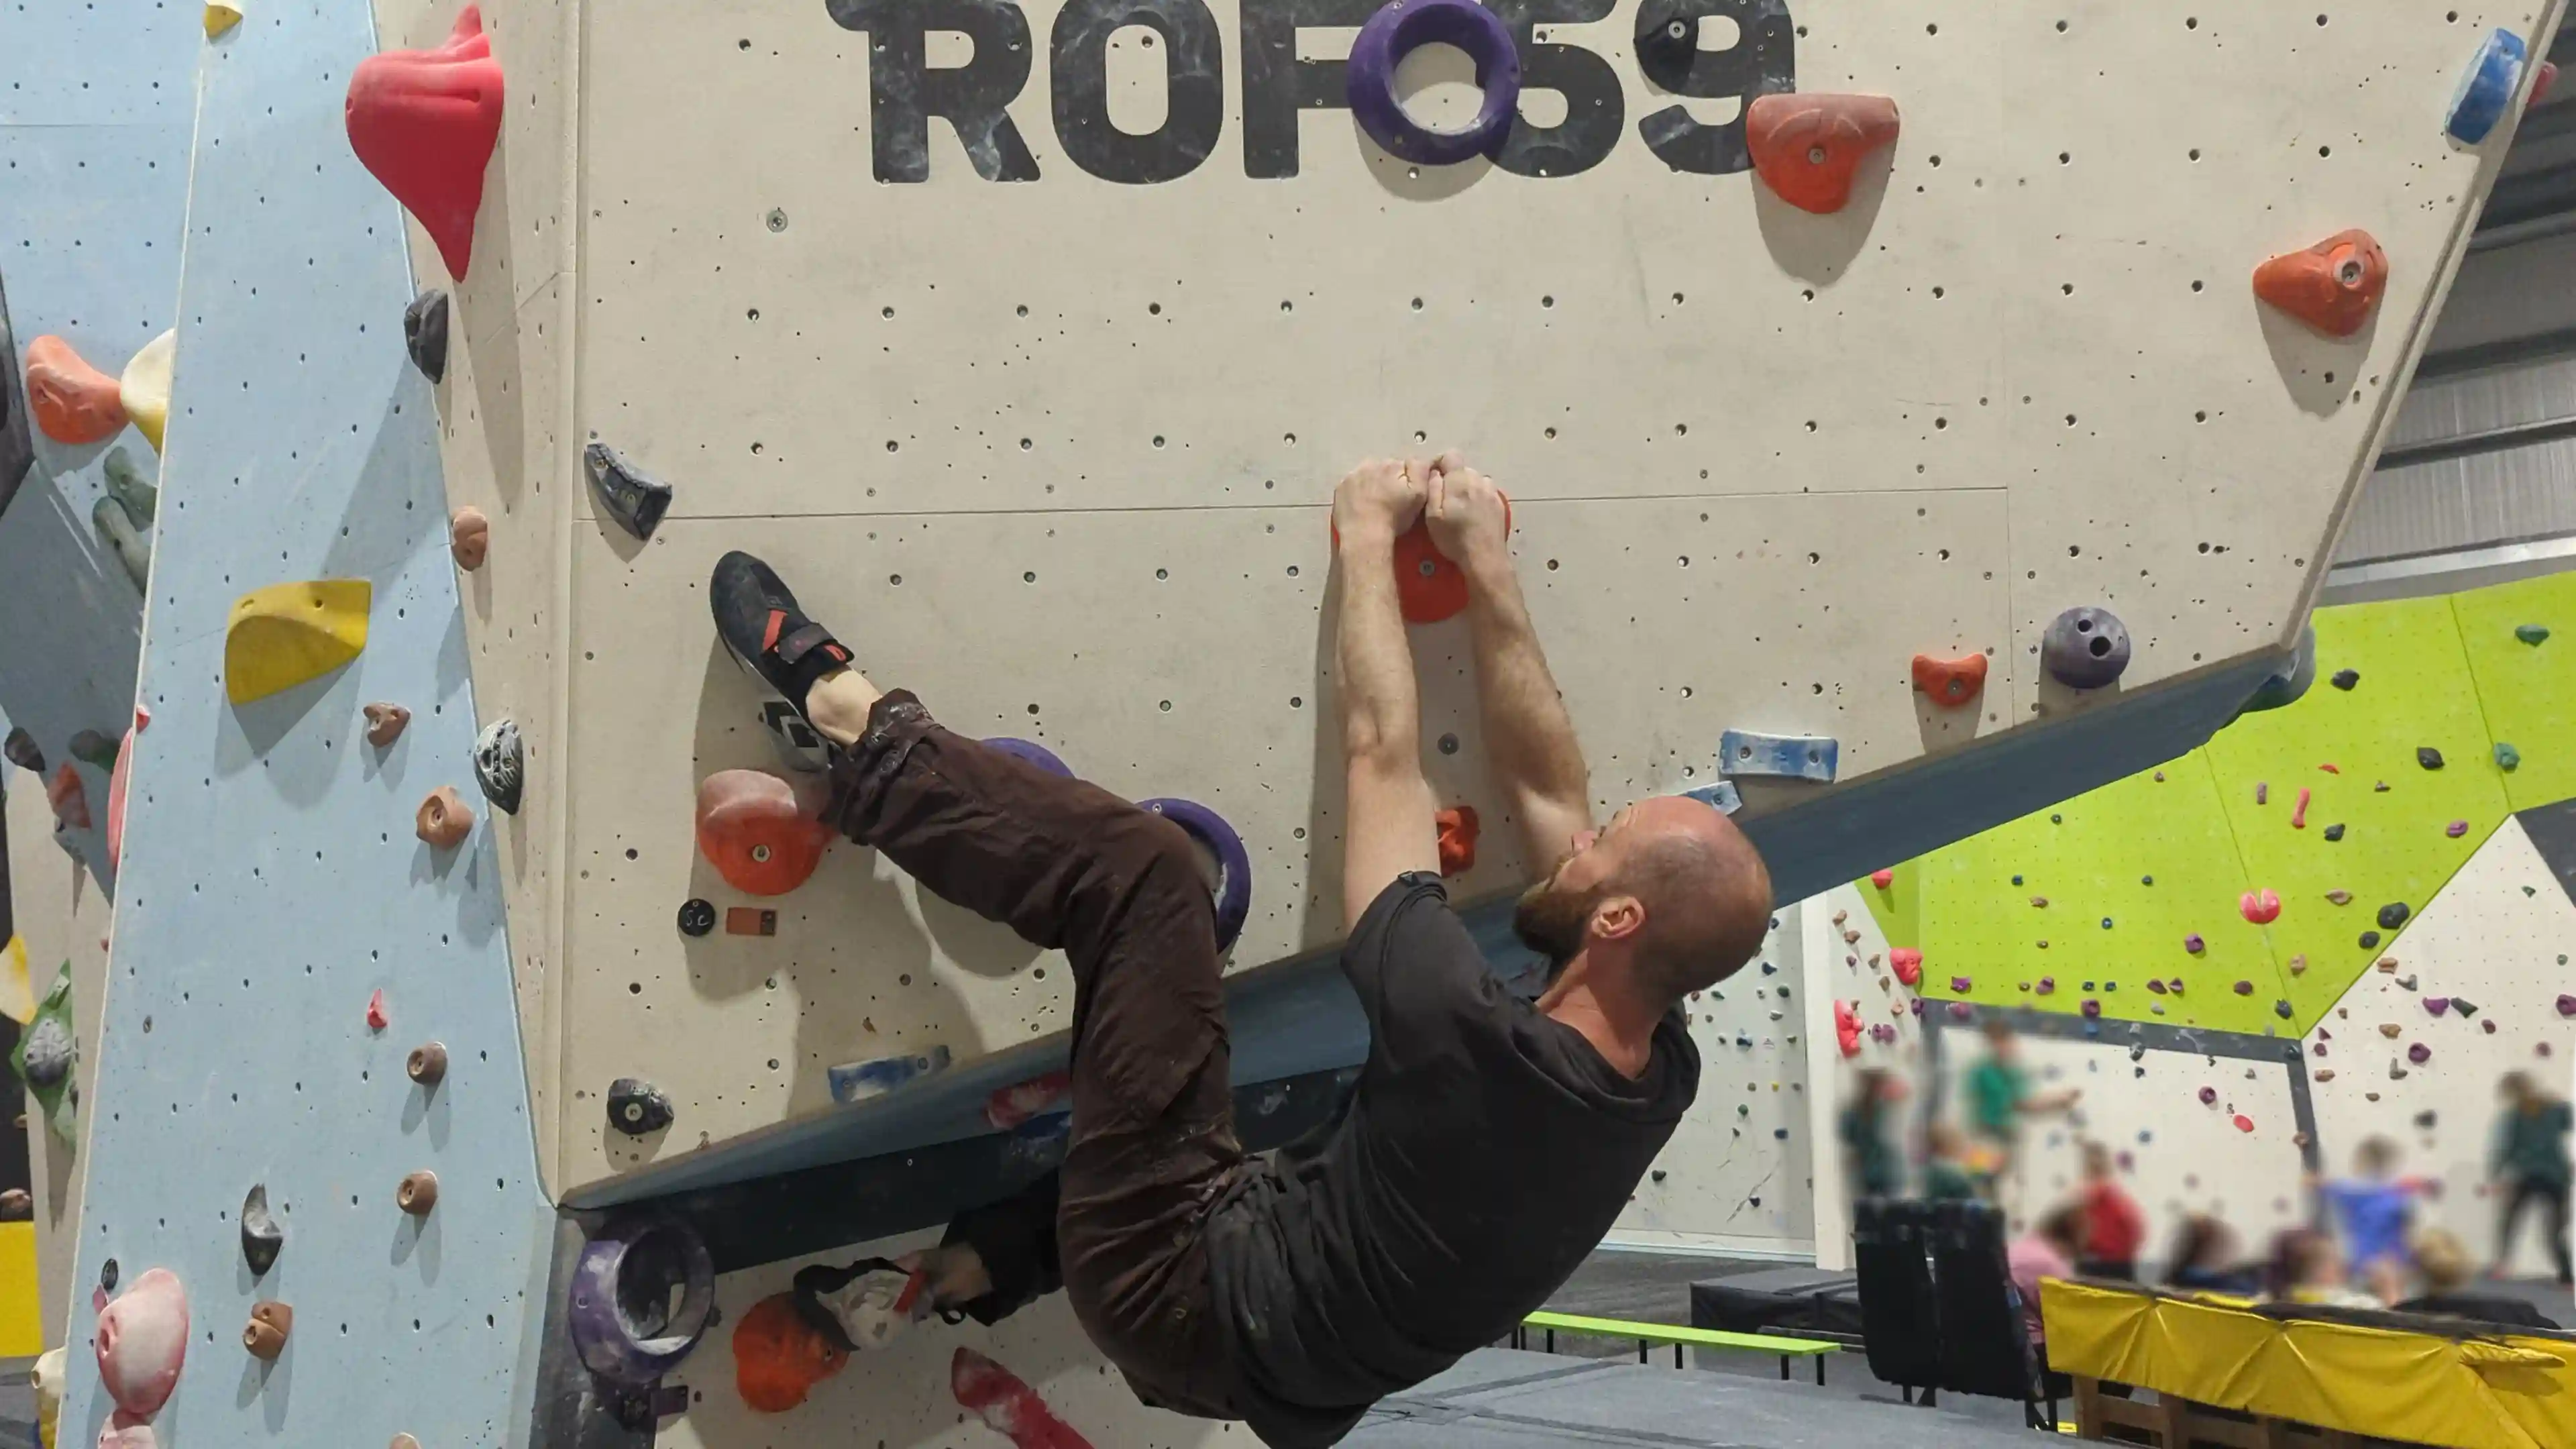
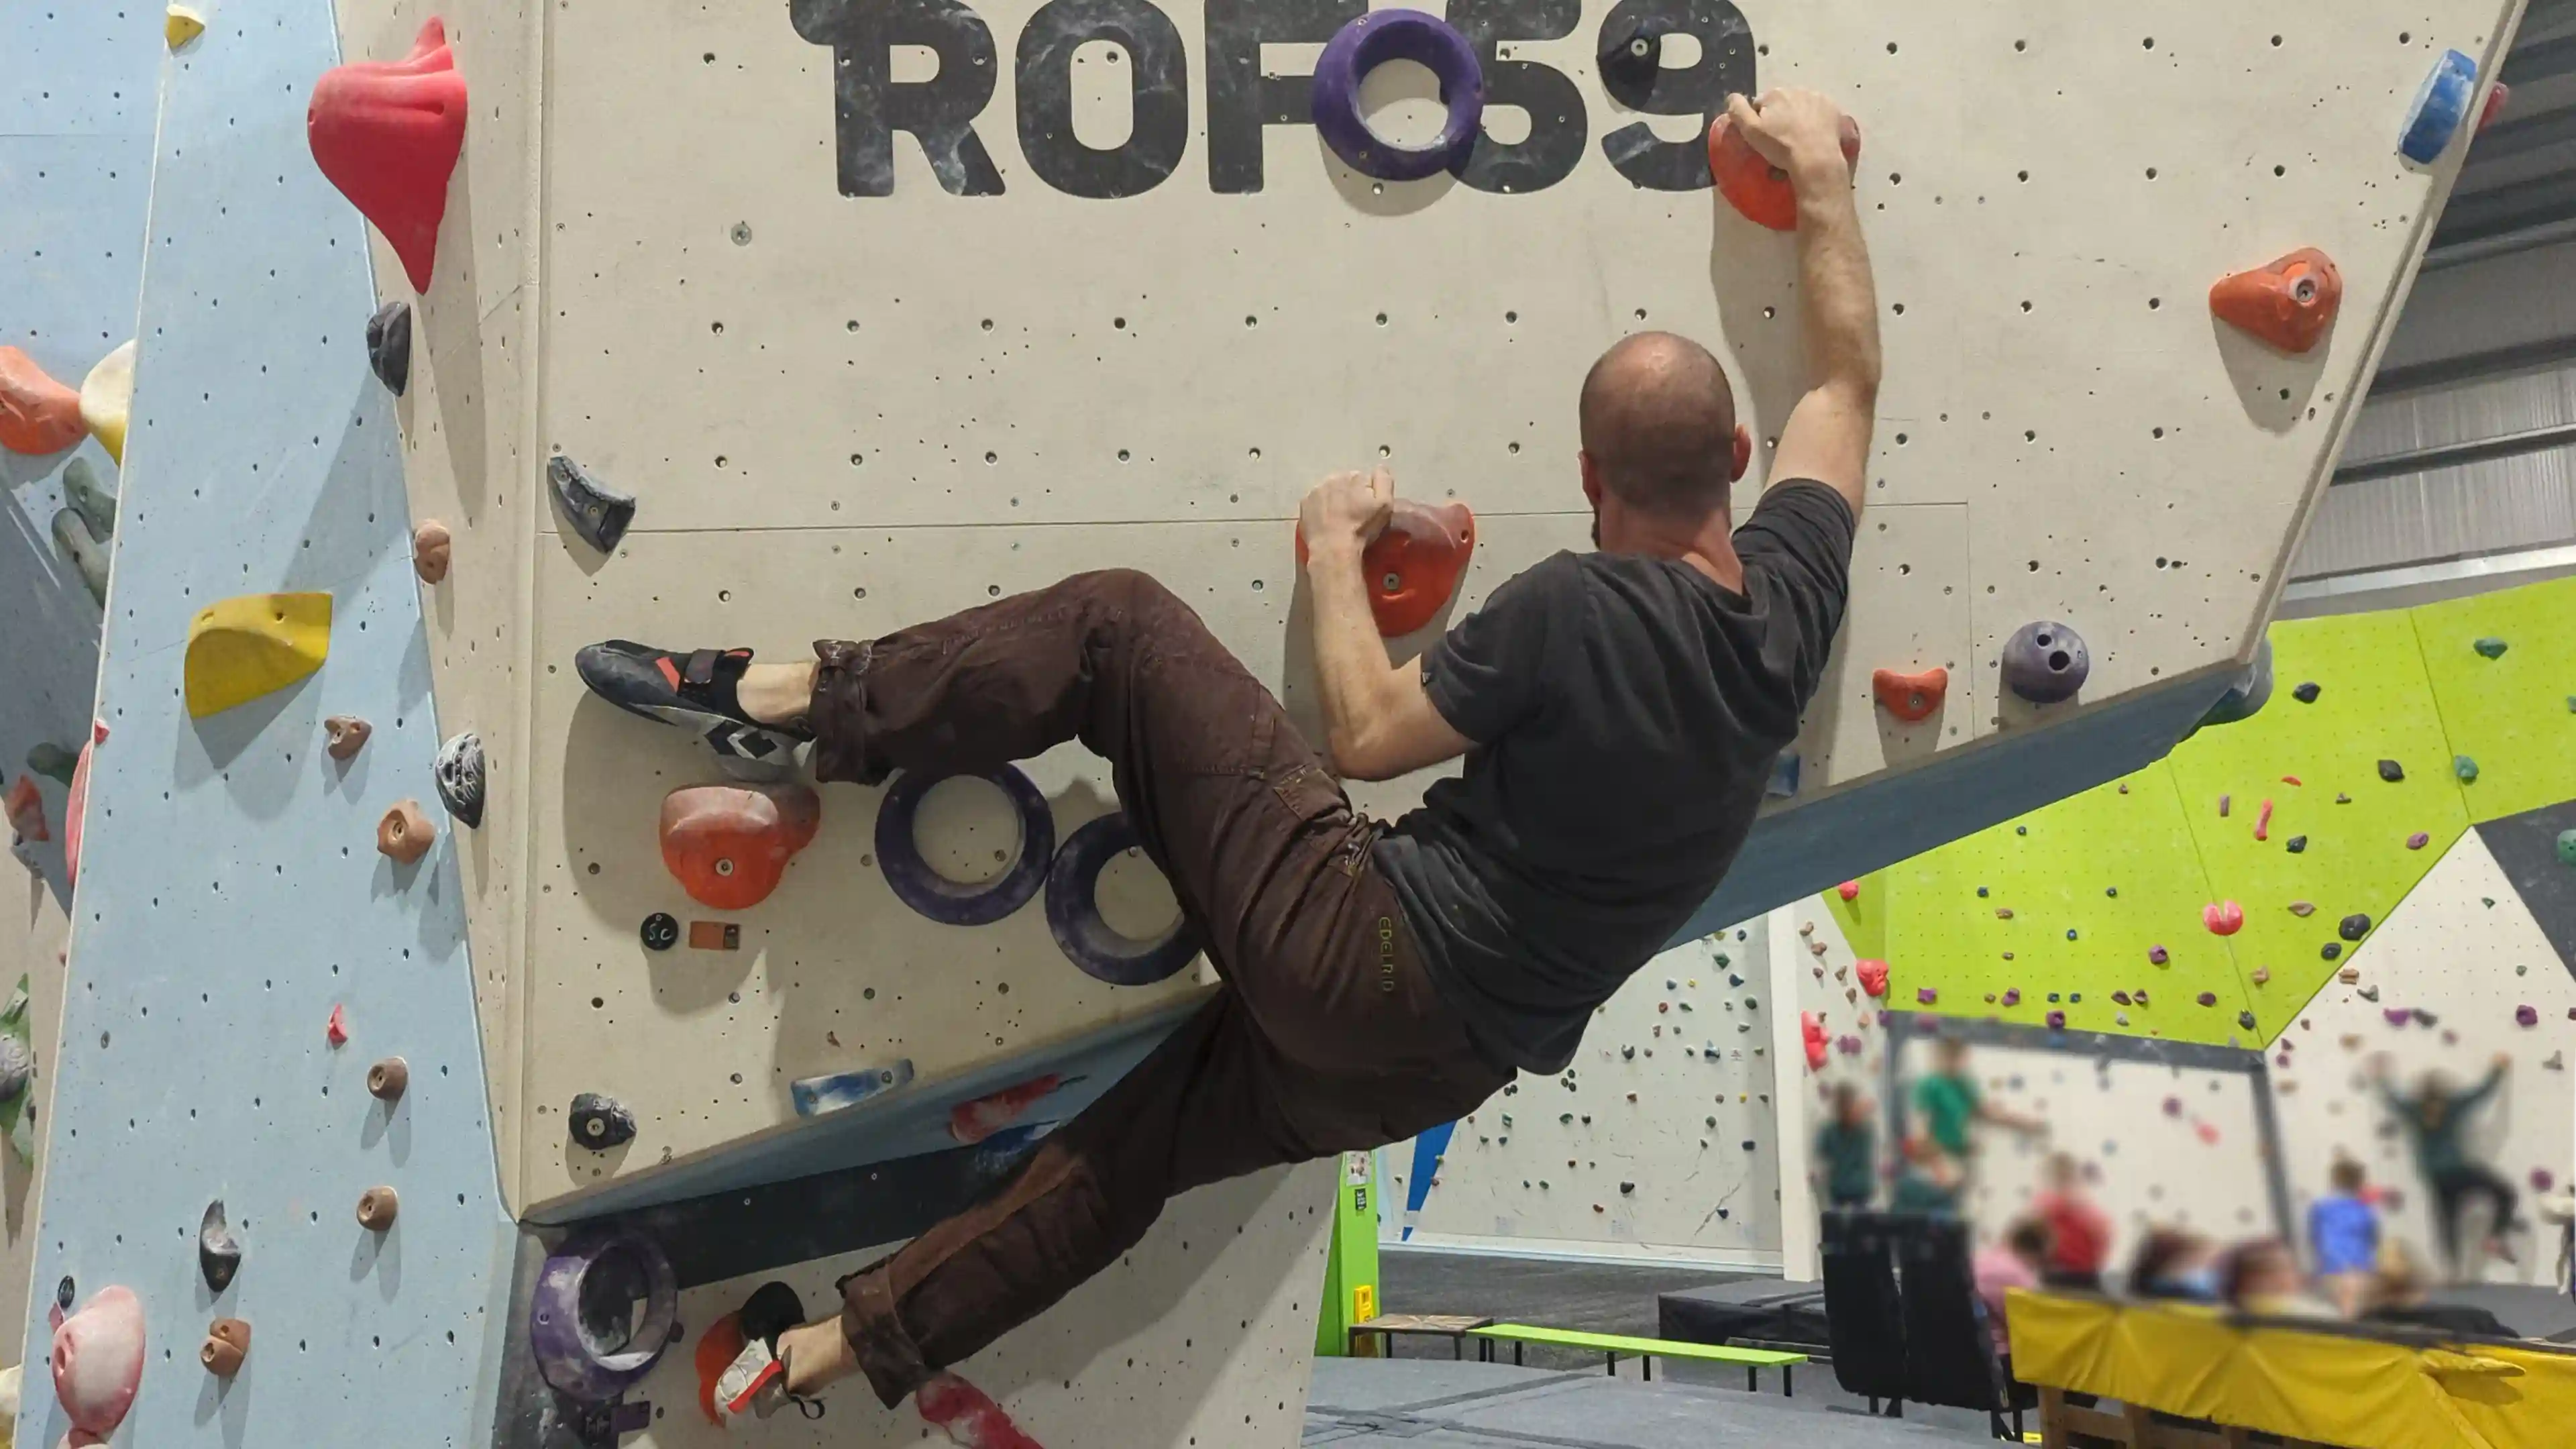
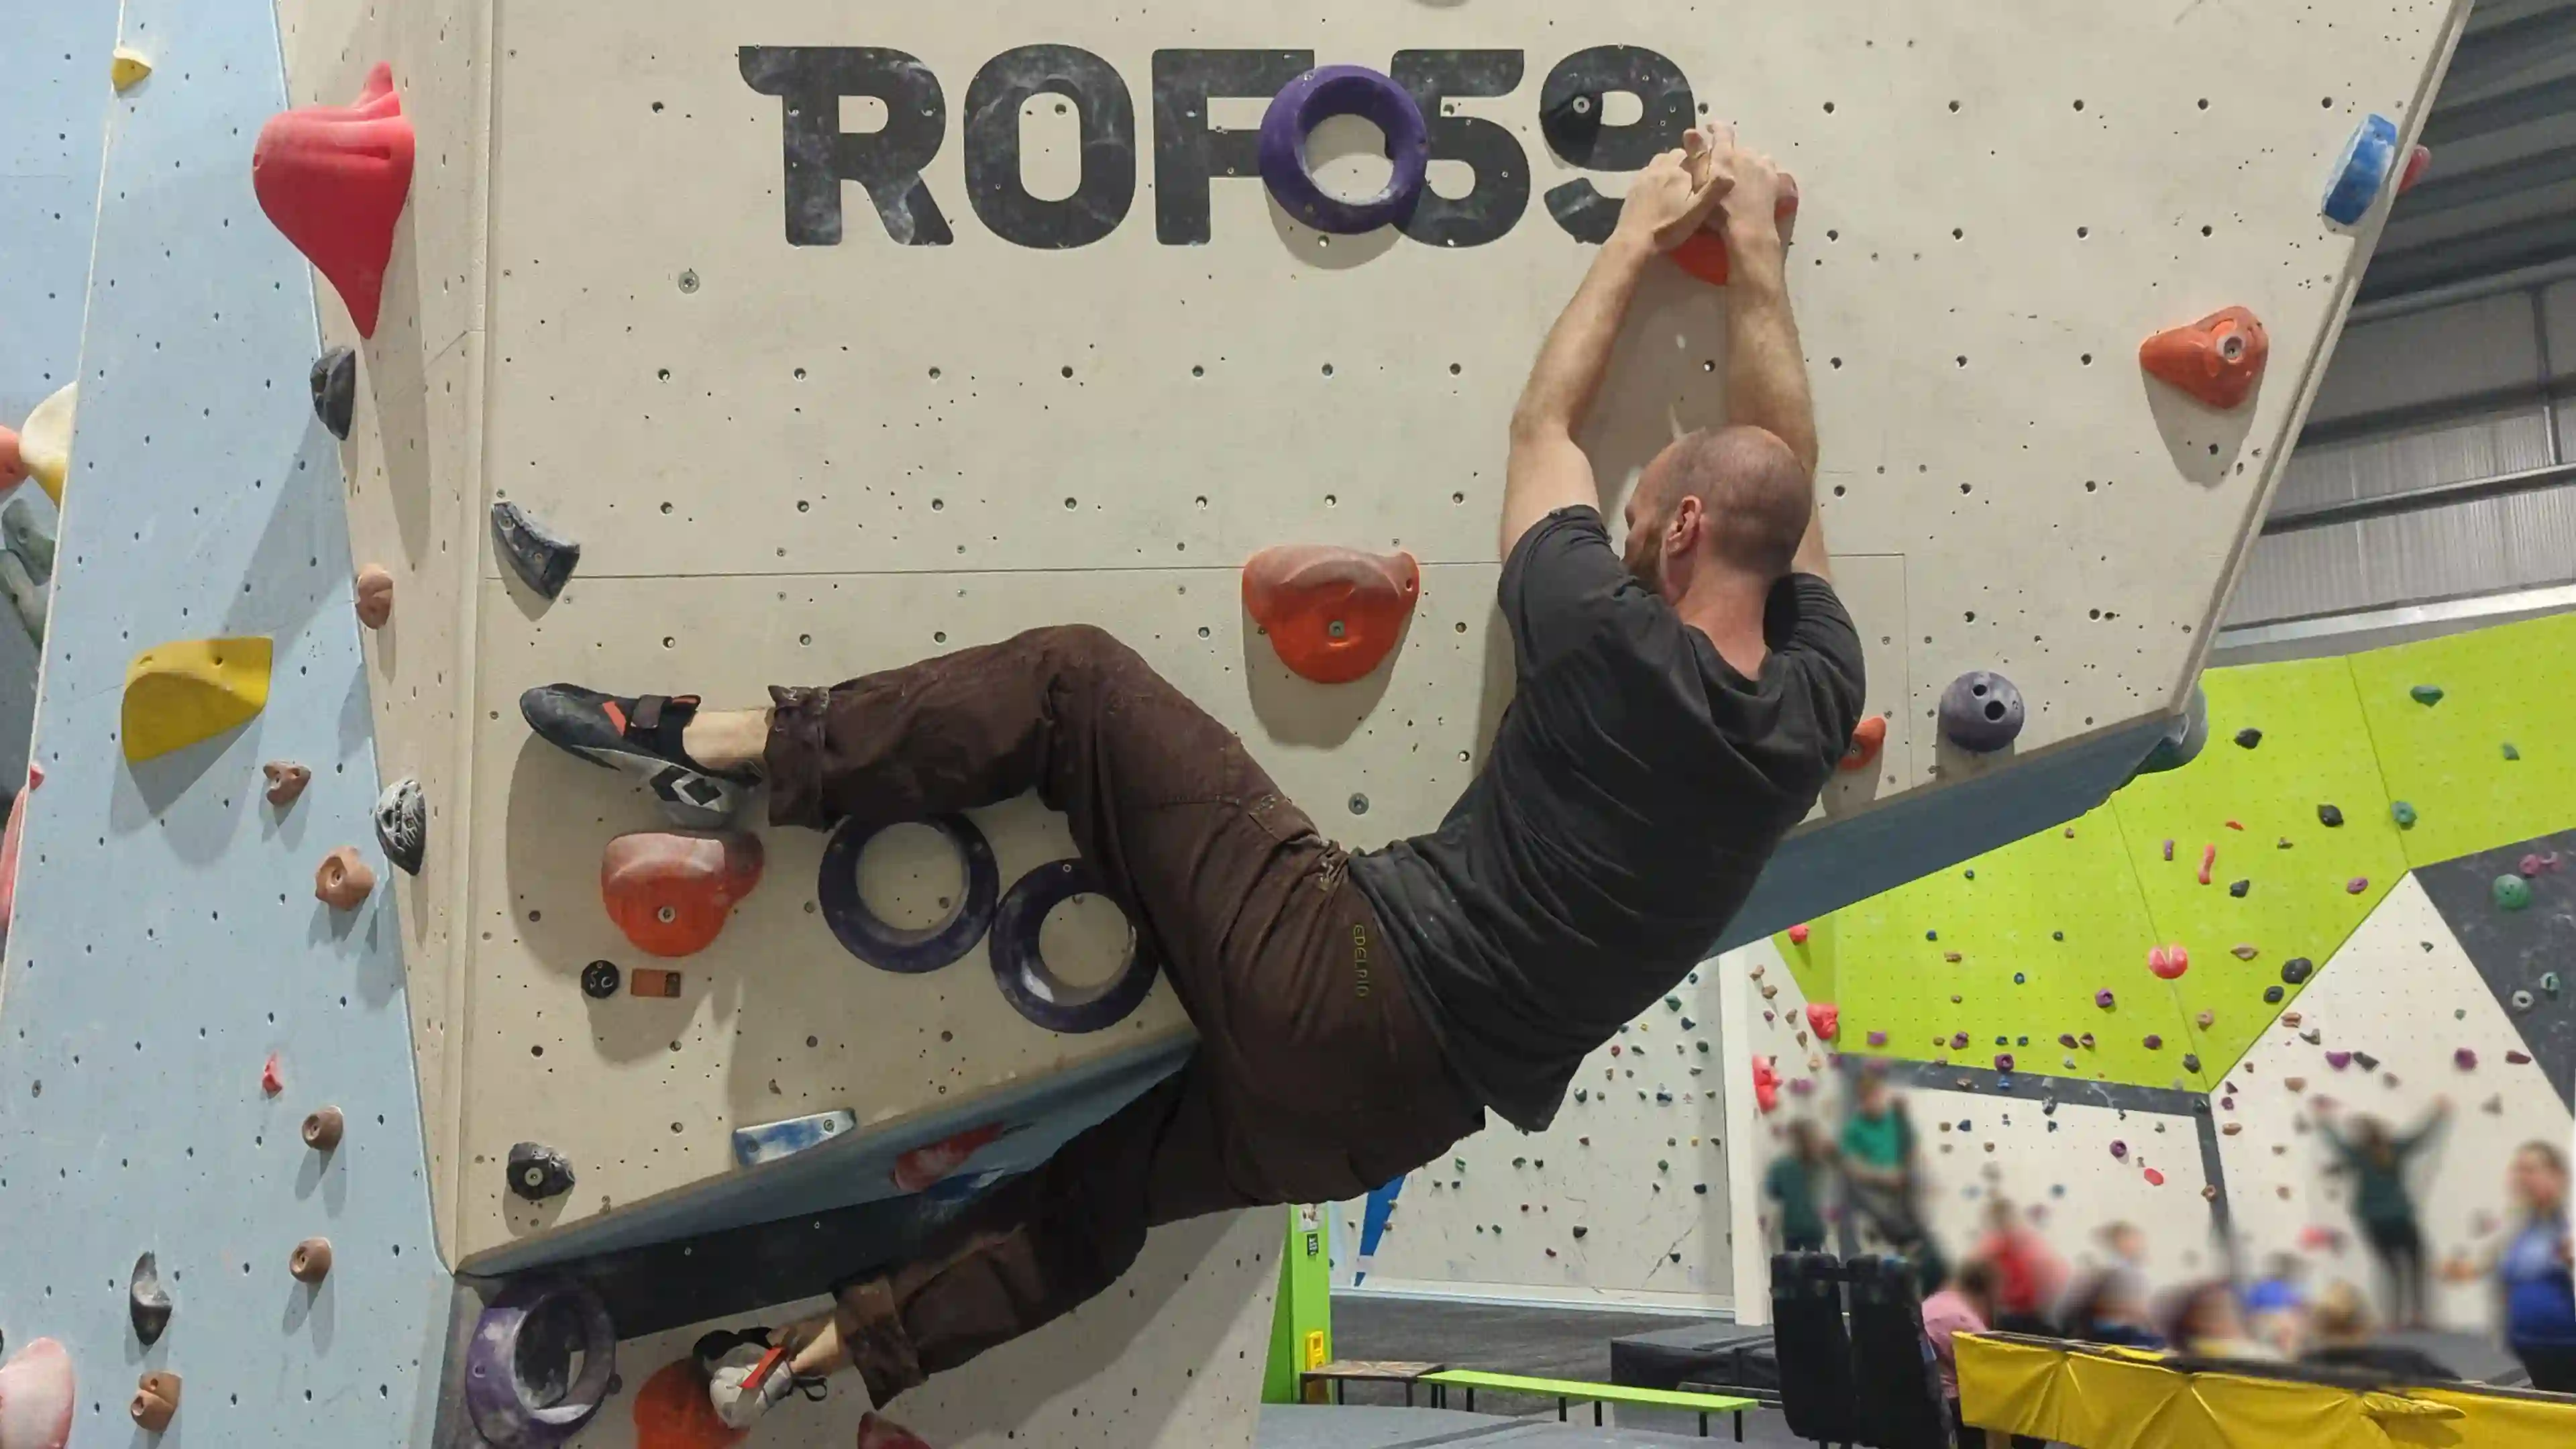
Video example of heel hook move / technique
This video shows a 6A route on the side of the wall which also happens to be an overhang. The climber places his heel on the flat hold and then drives his weight into in. This gives him extra stability and frees up his hands to reach higher. If the climber opted not to use the heel hook technique here, he would have to use his feet to try and get some leverage on a very steep wall, with no footholds which would put all the weight onto his hands and ultimately lead to him having to drop down.
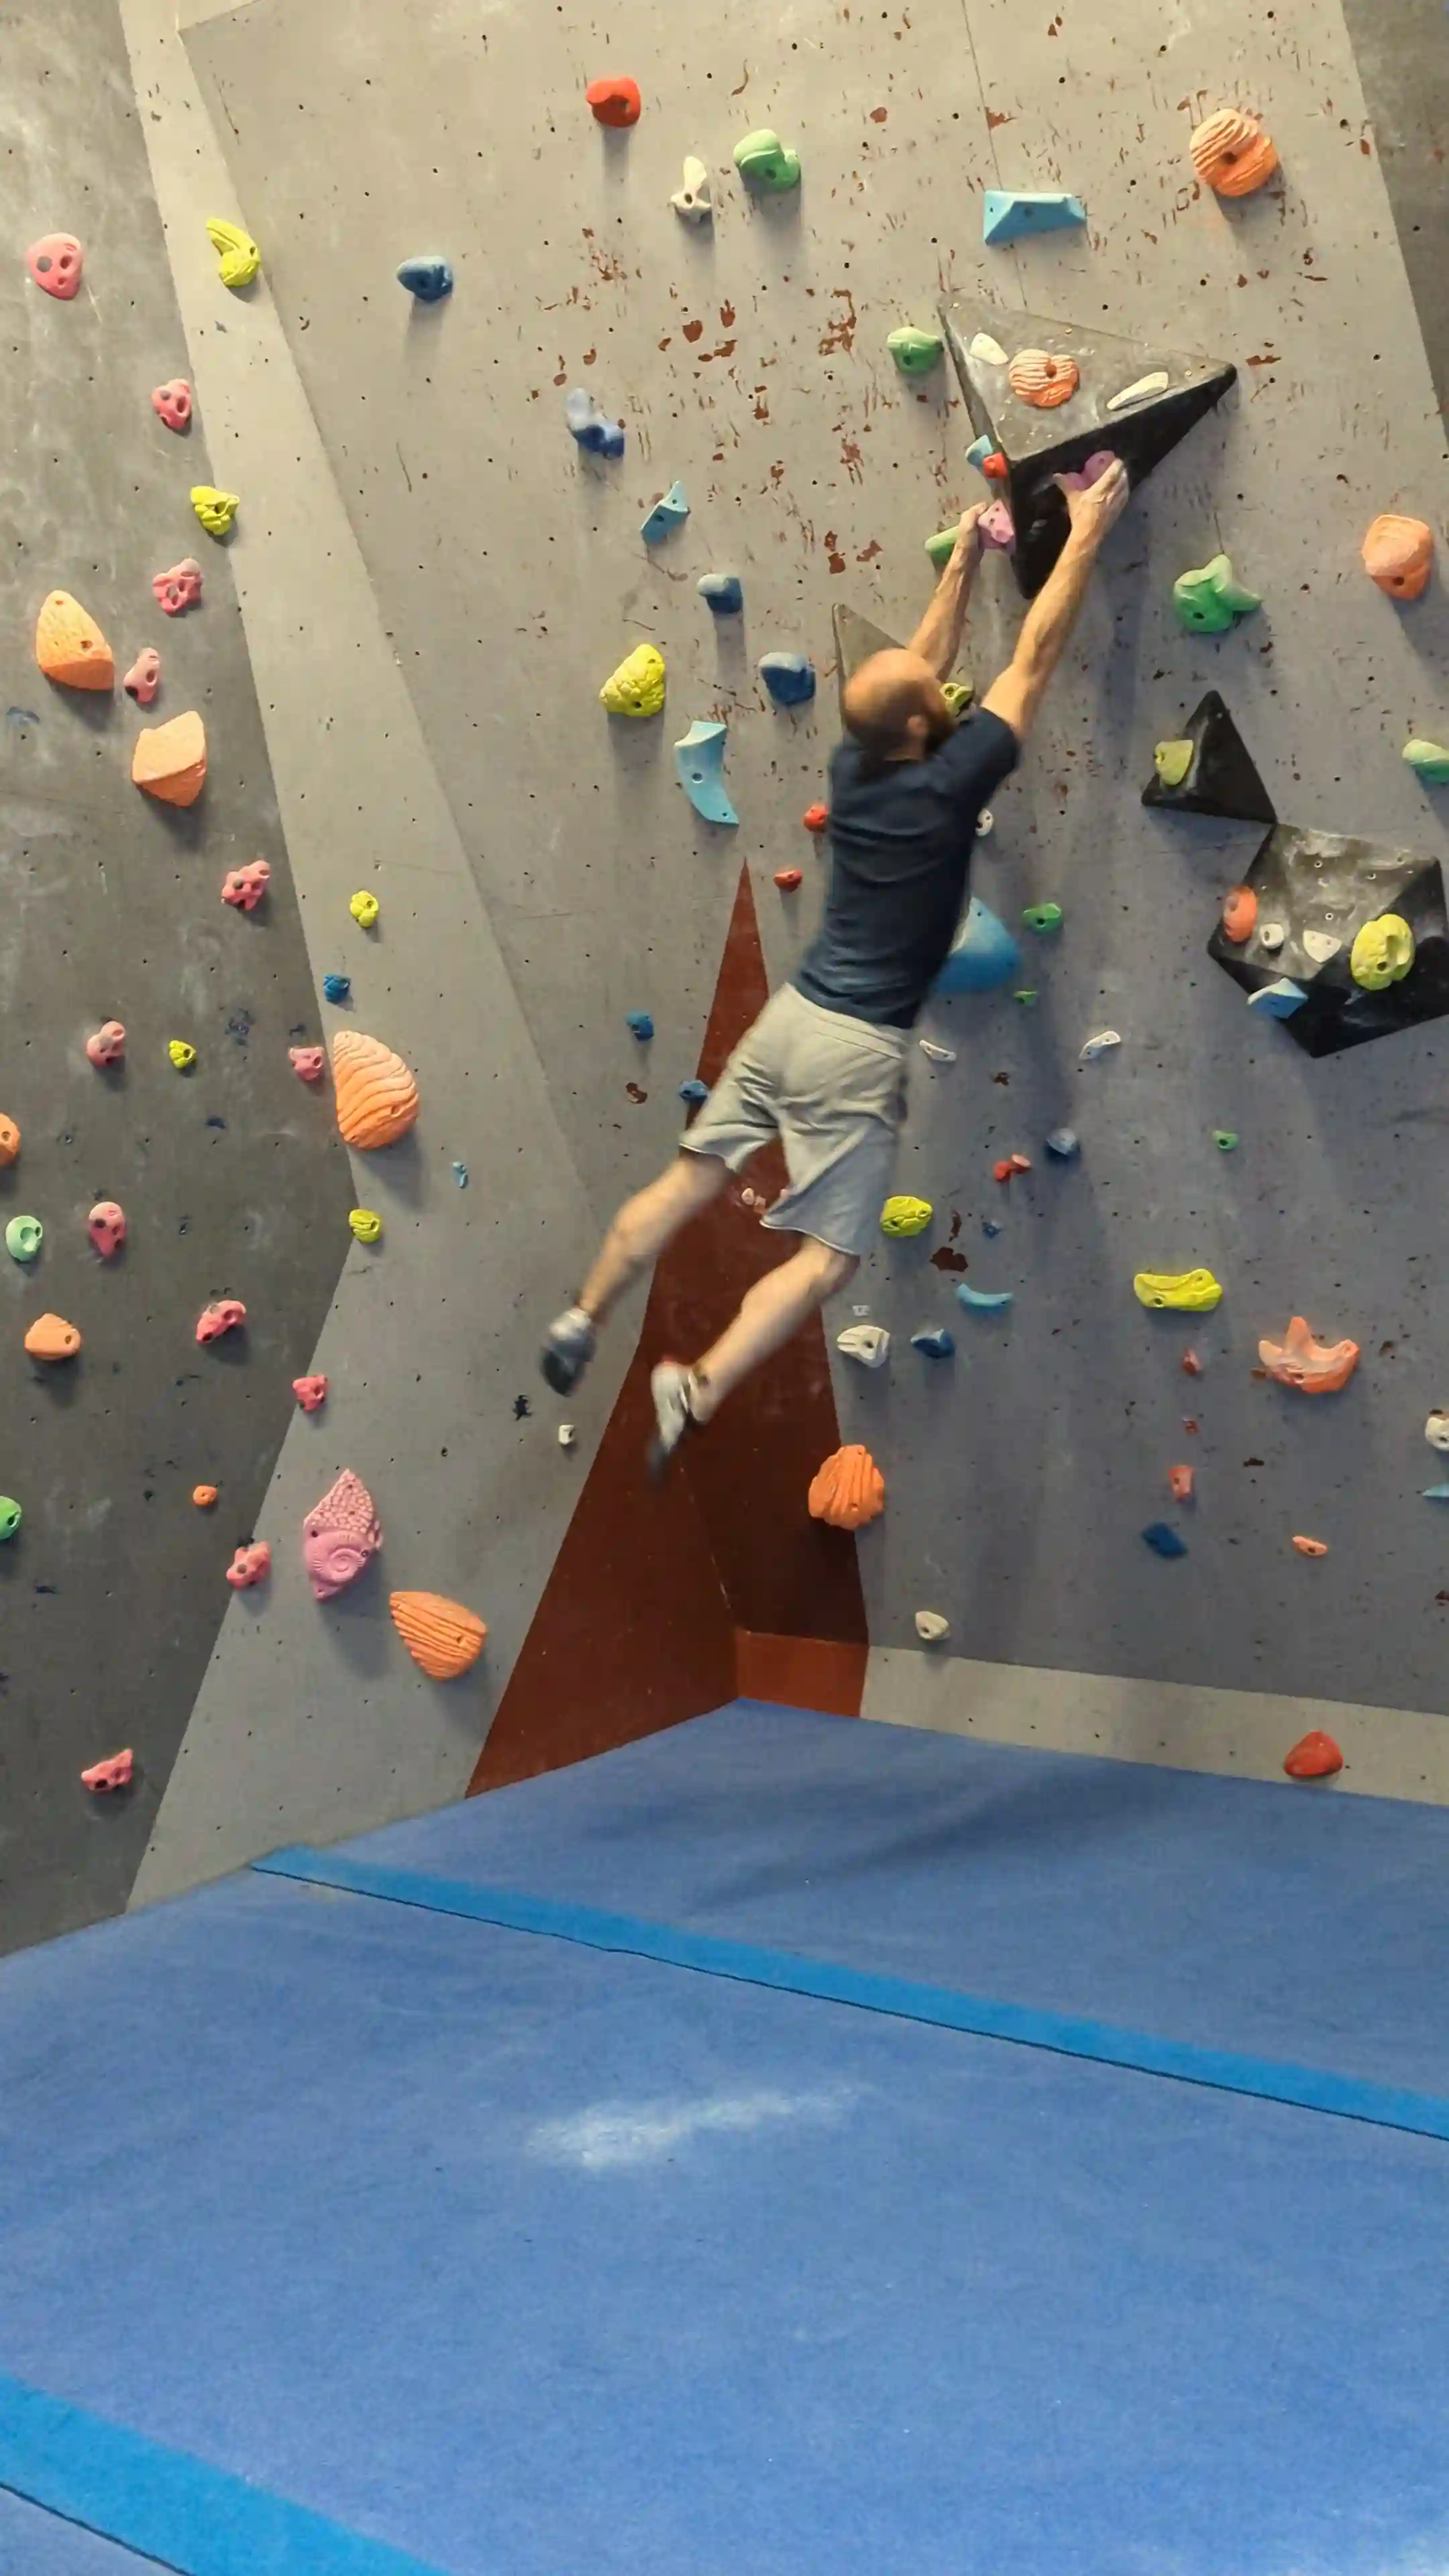
Dynos
Dynos are cool! They are something different to try and if you spot one in your climbing gym you should definitely give it a go.
Above we looked at static and dynamic styles of climbing. Is a dyno the same as dynamic climbing? Yes it is, however the nuance is that they are a specific type of dynamic move that will have you jumping, swinging from or lunging towards another hold.
Some Dynos will require a run up from the mats like in the video below or they will require you to be on the wall and then perform a big jump up towards the higher holds.
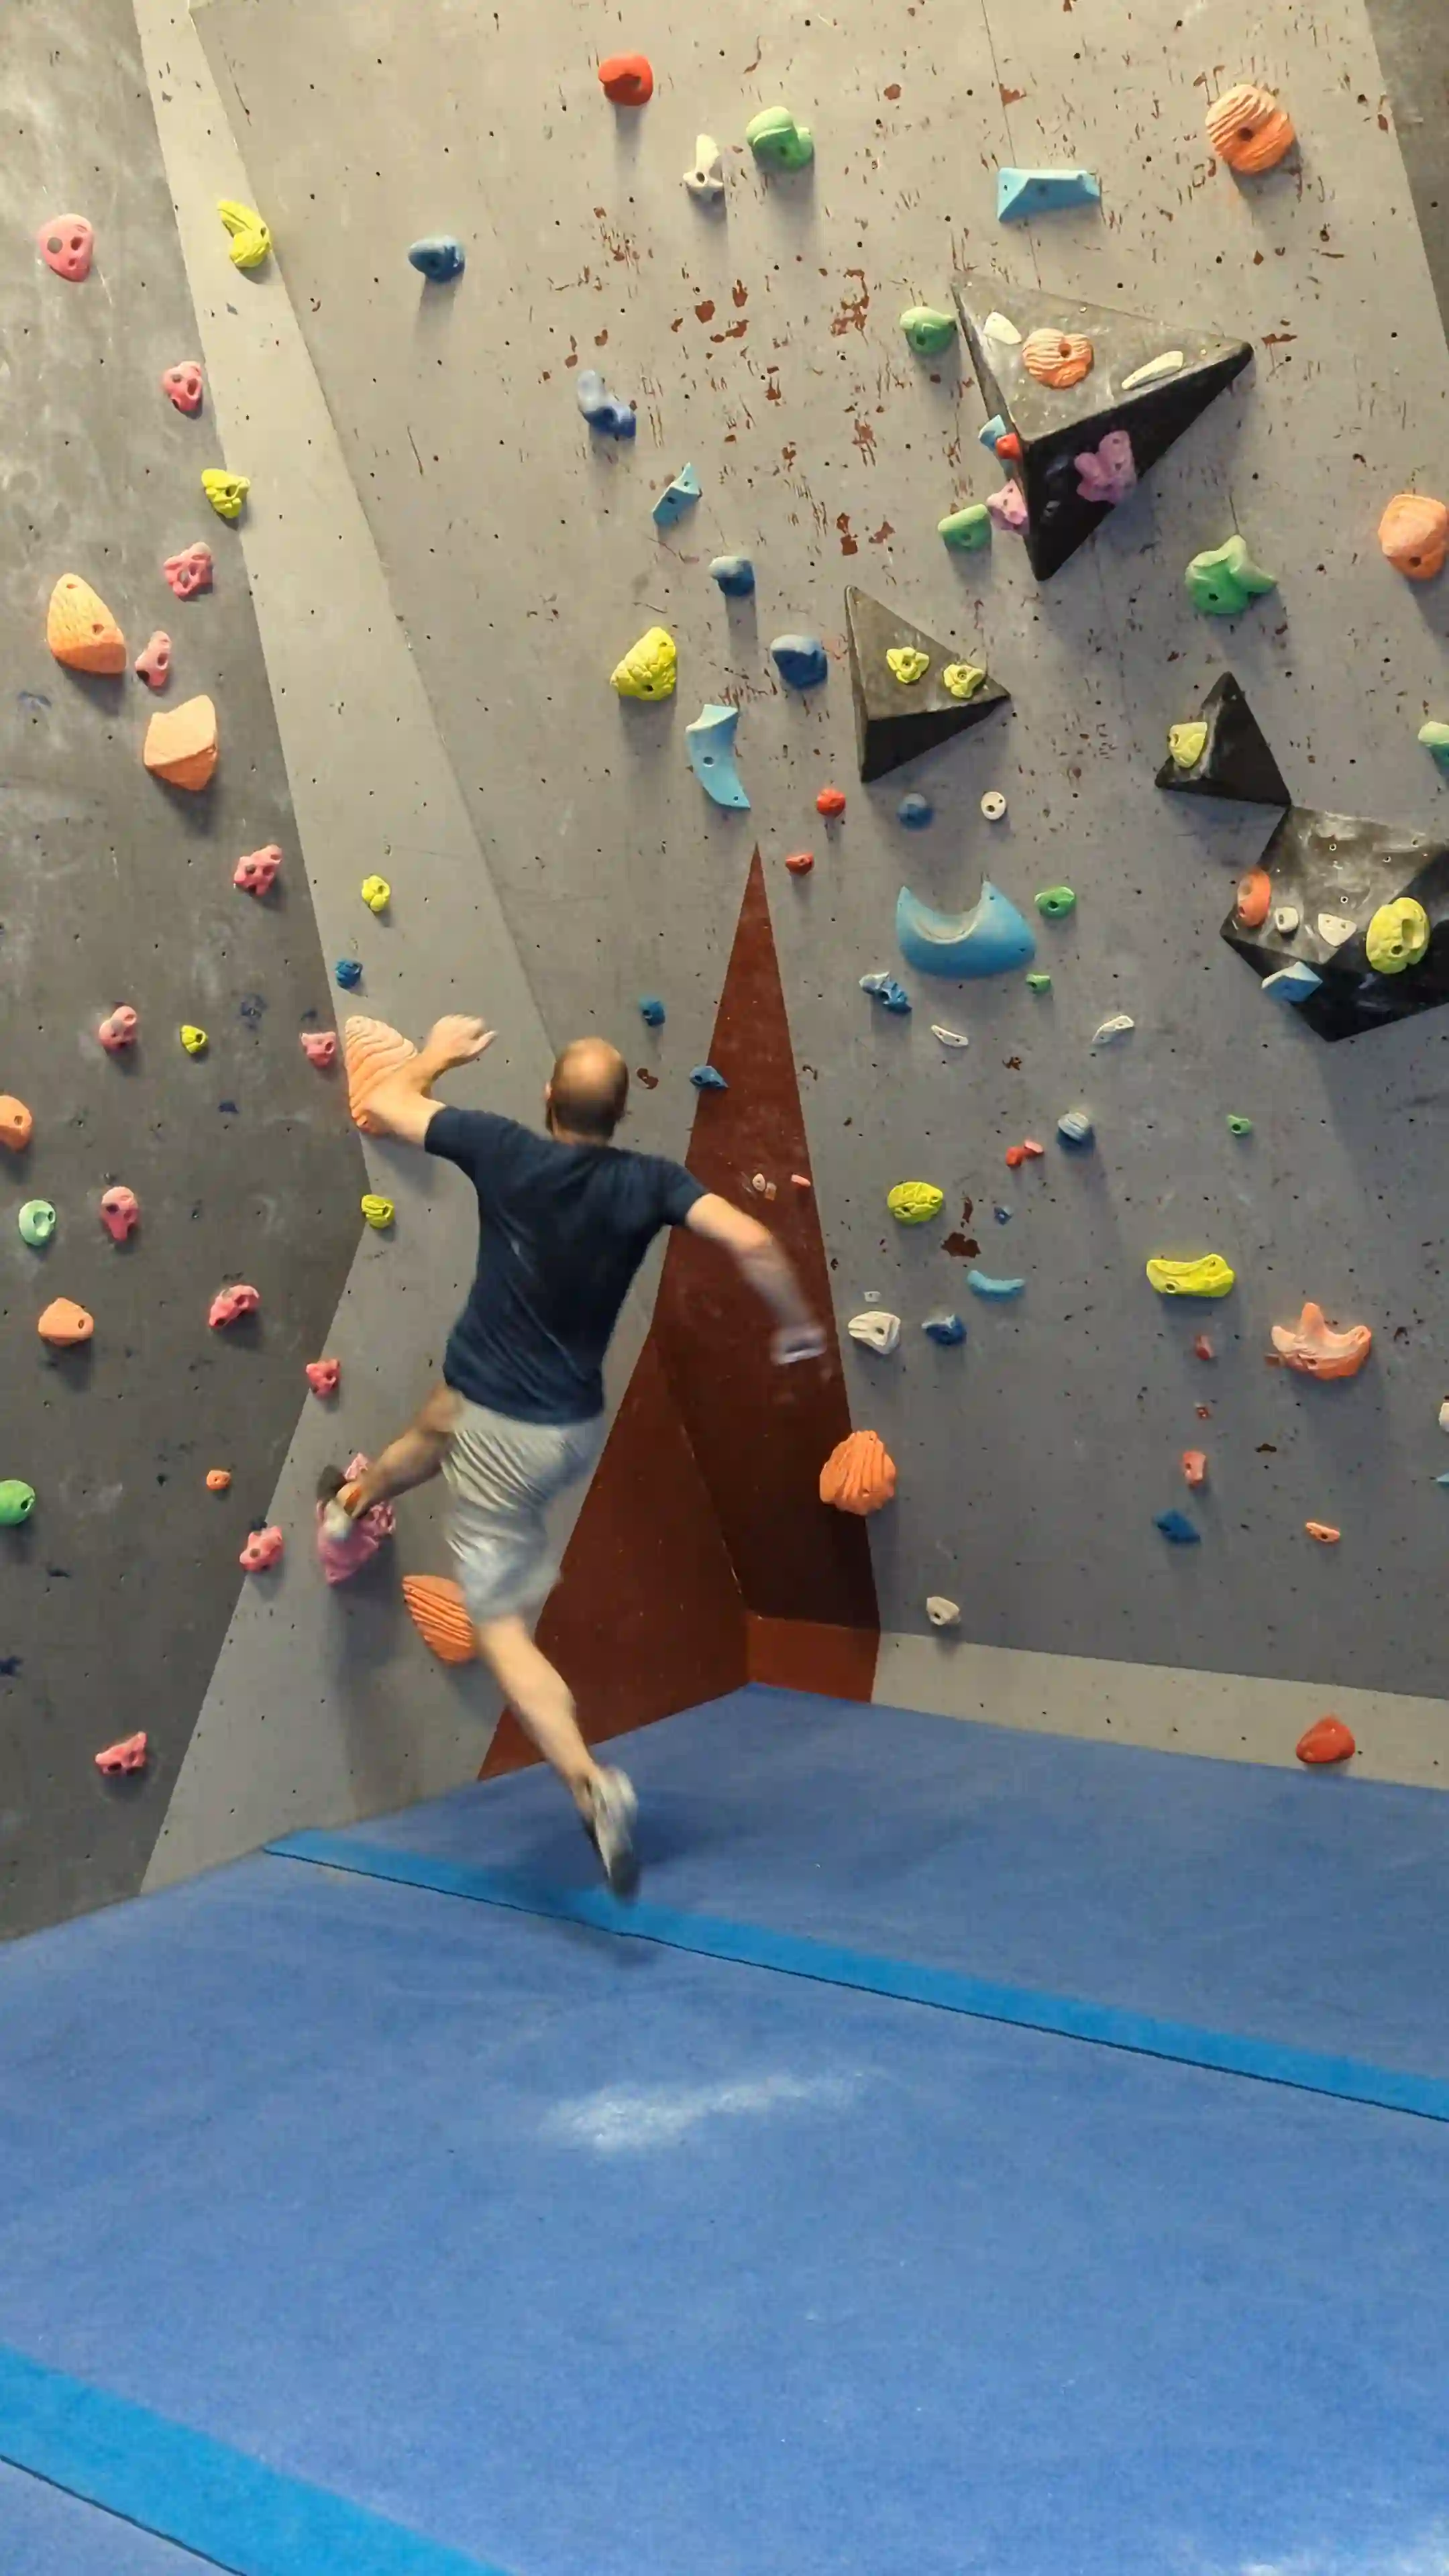
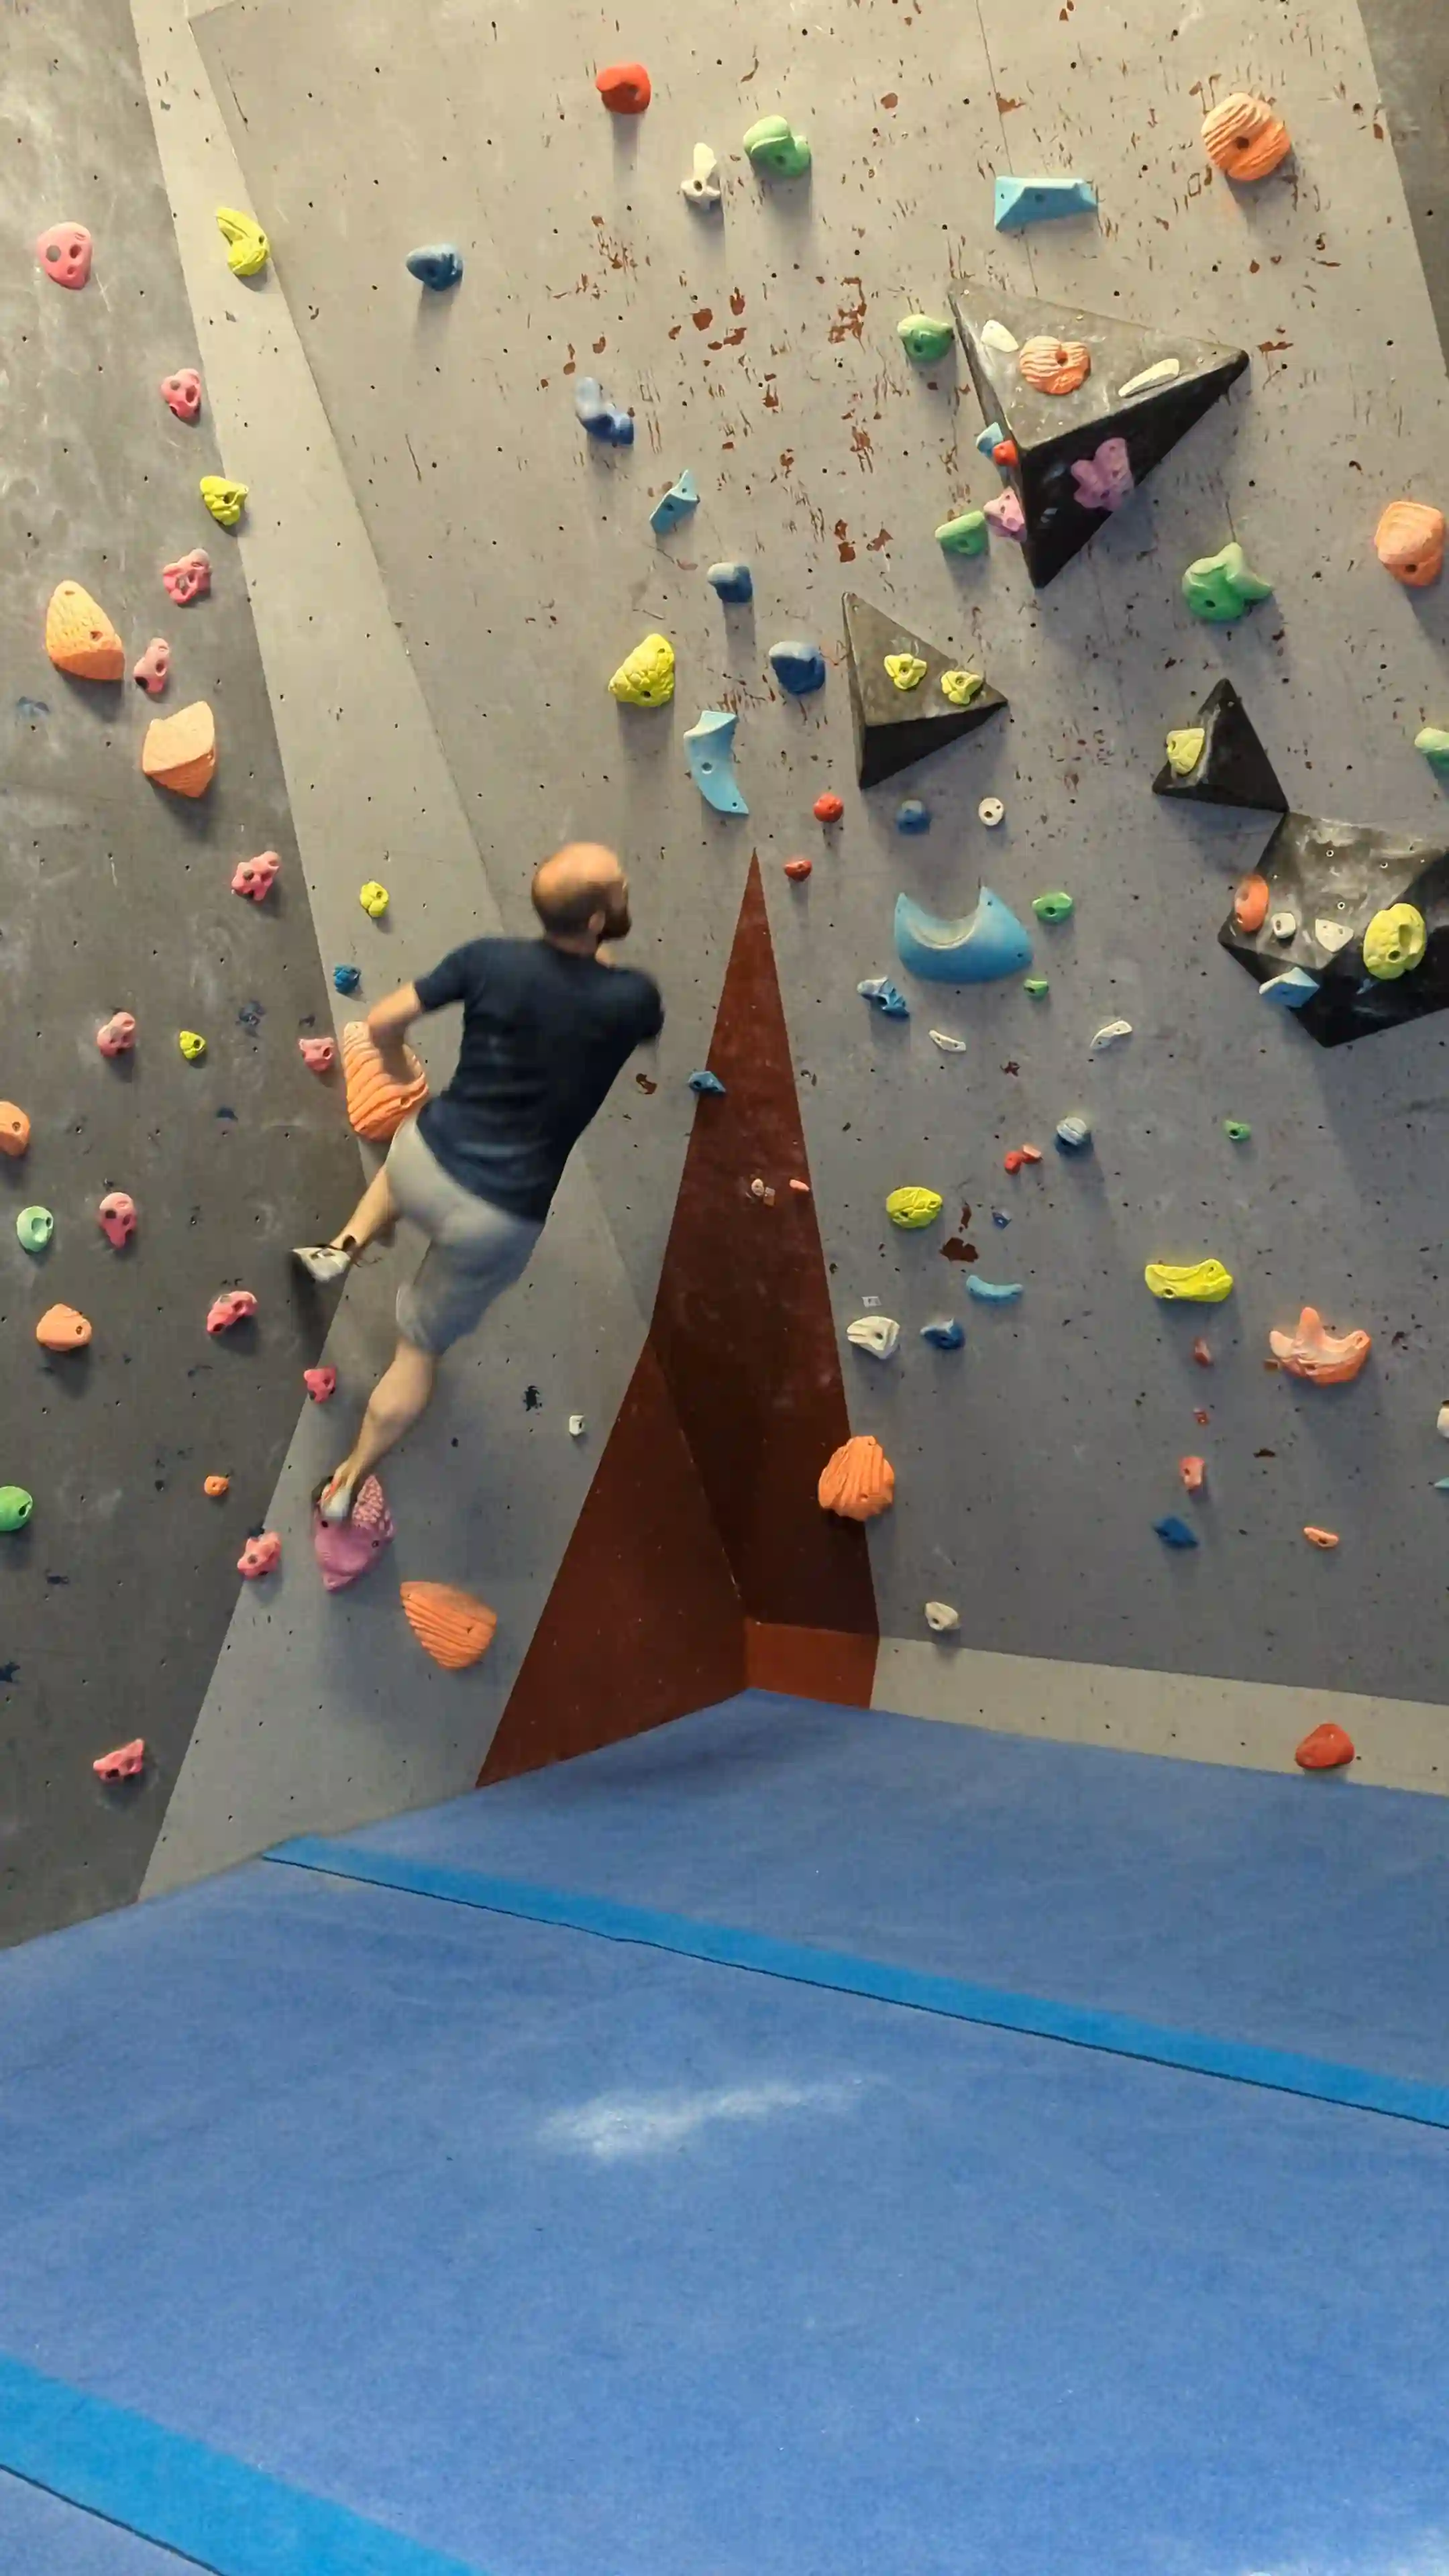
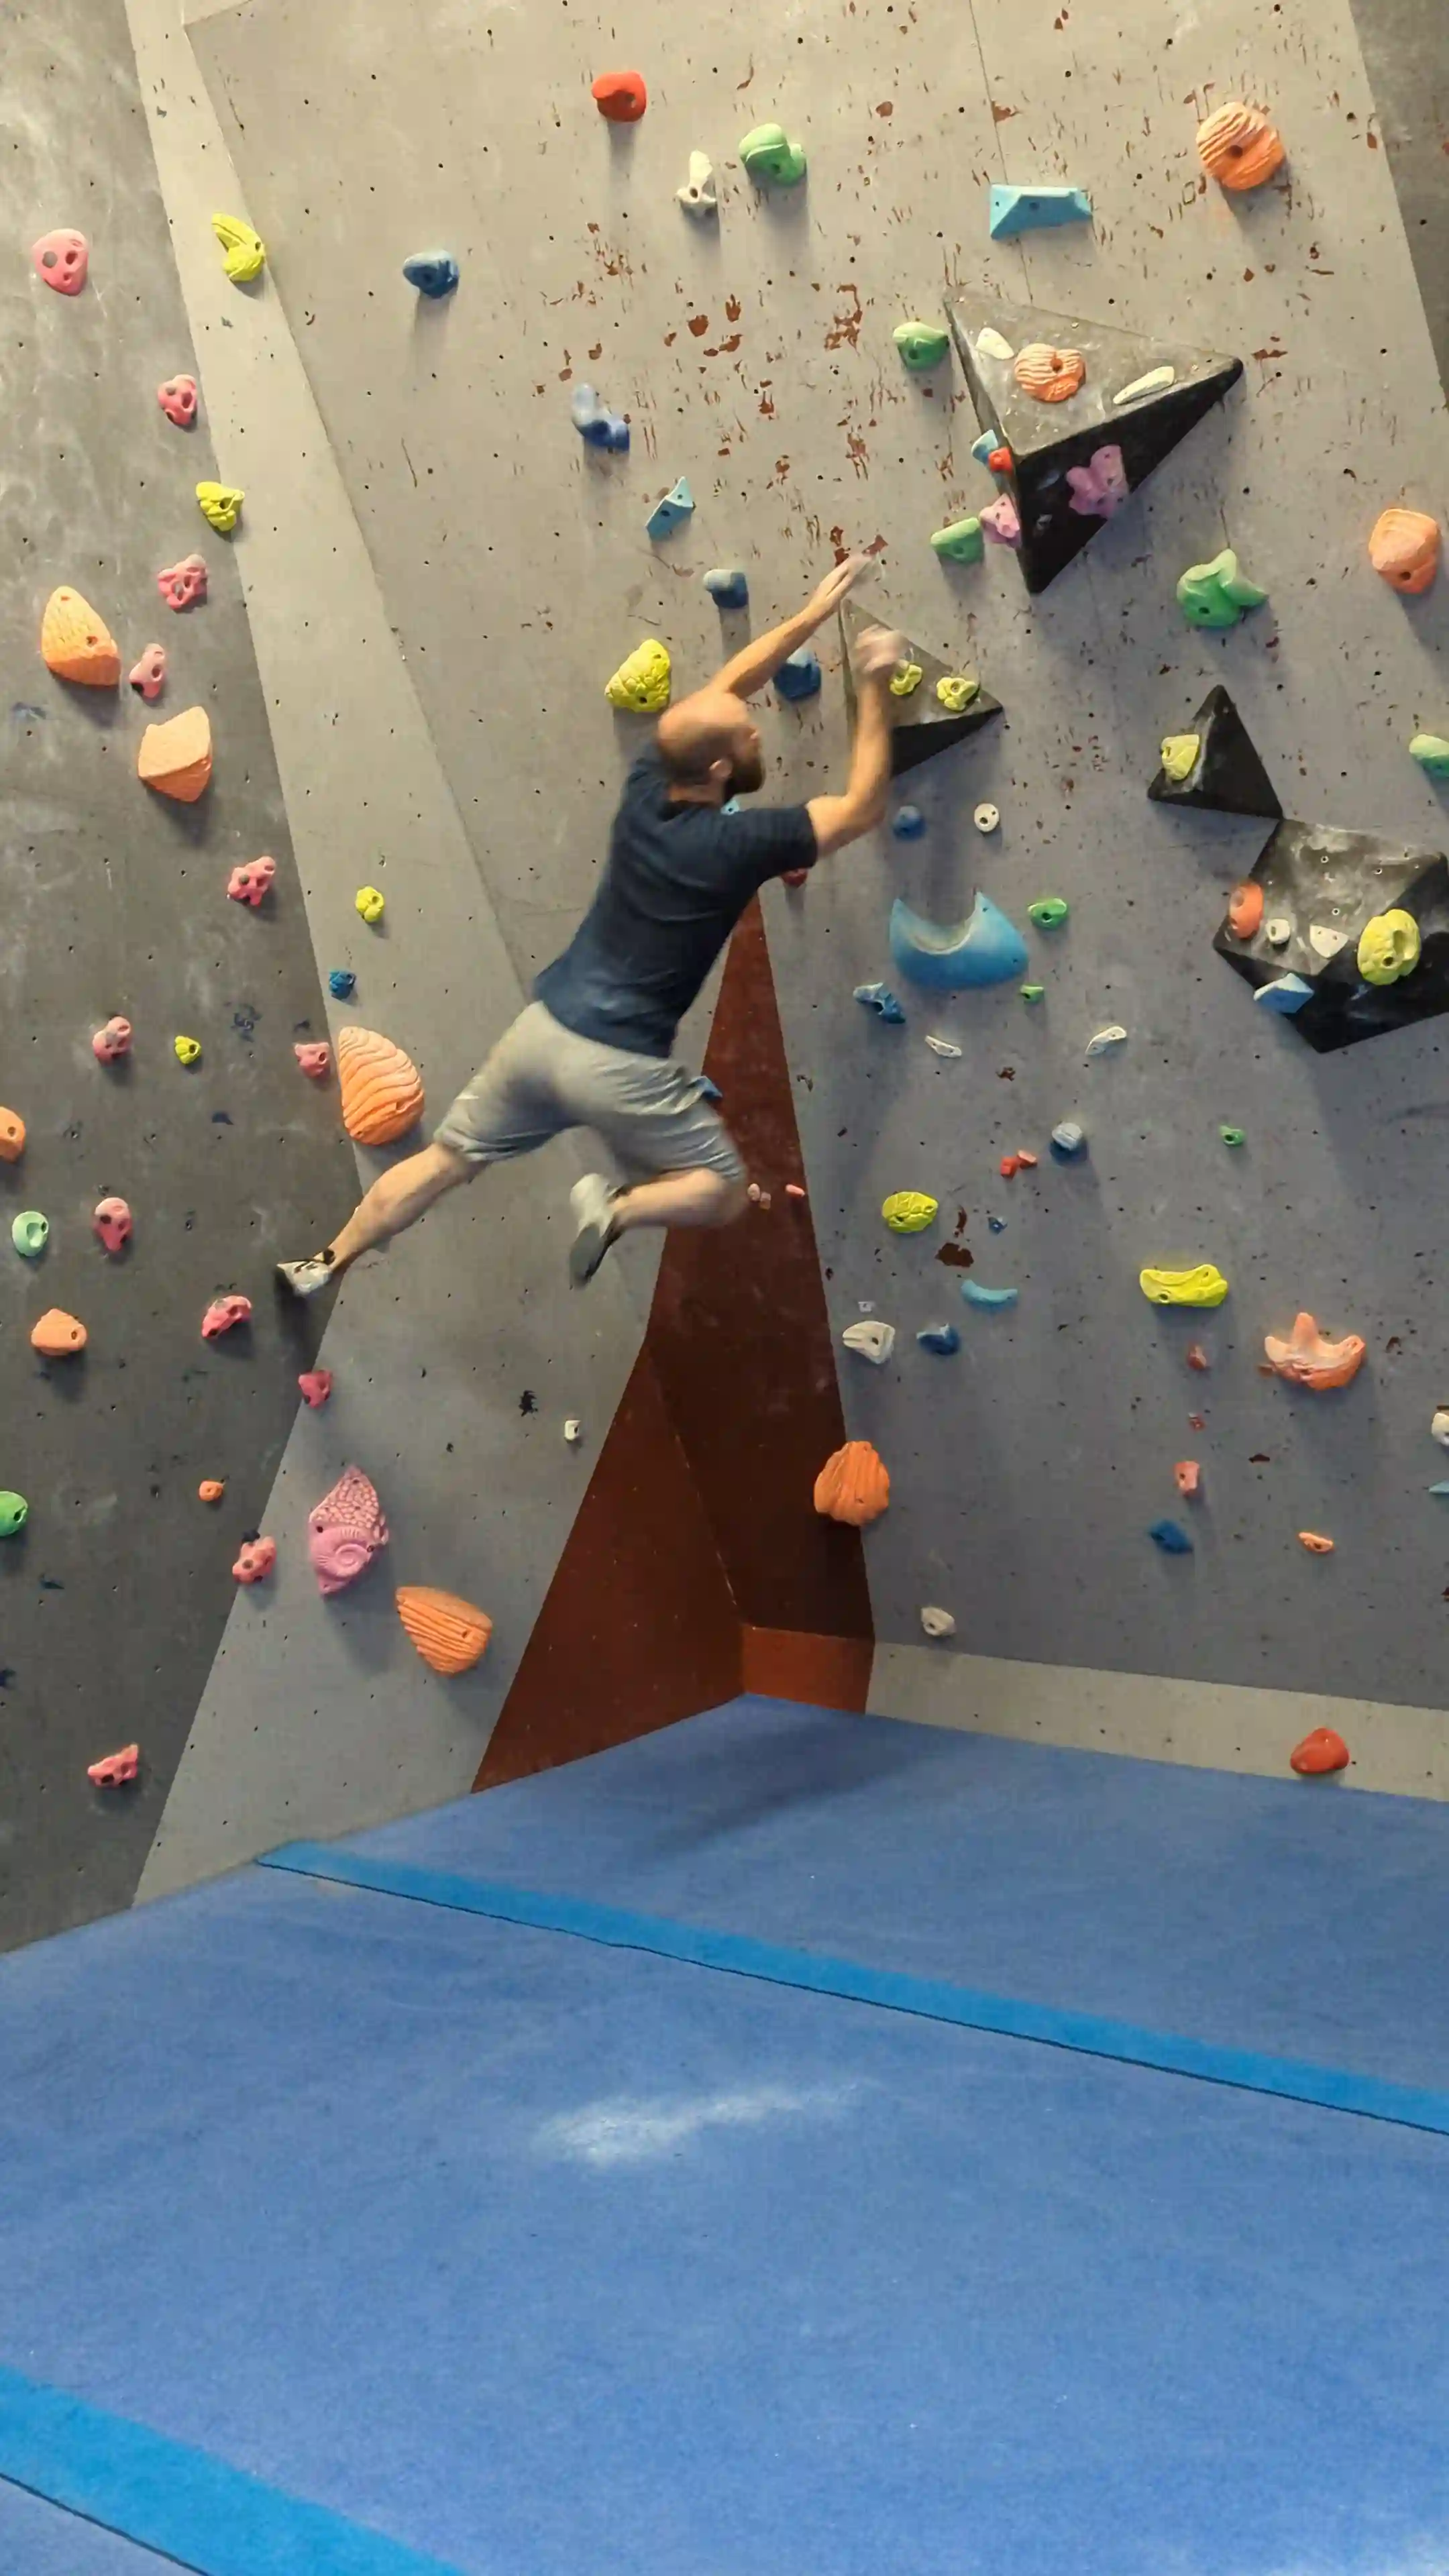
Video example of a dyno move / technique
The first video shows a dyno where the climber needs to take a run up towards the large foothold. You can see that after he places his right foot on the hold, he then uses his left foot to smear up the wall, also whilst turning his body towards the direction of the top holds. He uses his left foot to push himself towards the final hold. After this he extends both his hands out to try and grab the two holds on the volume.
These types of dynos are fast paced and fun, however you need to be careful. If you don't manage to stick the hold, you then need to think about how you land while moving at speed. You can see at the very end of the move that the climber lands awkwardly on his feet. It's very easy to partially grab the final hold and slip off it, which alters your trajectory and your body position. These types of dynos require full commitment!
The second video shows a dyno where the climber is already on the wall and then launches himself up towards the next hold. These types of dyno require a lot of power to be driven down through the legs to get that initial jump upwards. What I like to do in this position is to first perform a "range finder" jump. I don't fully commit at this point, I just do a test jump to see how far I actually need to jump. Think of it as a trial run before the proper attempt.
It's worth noting that some dynos start half way up the wall. In this case they become more scary to do, as you've got further to fall down if you miss the holds. The fear can suddenly become real! Make sure the area below and around you on the mat is clear and just go for it! You'll be buzzing with excitement afterwards if you land it!
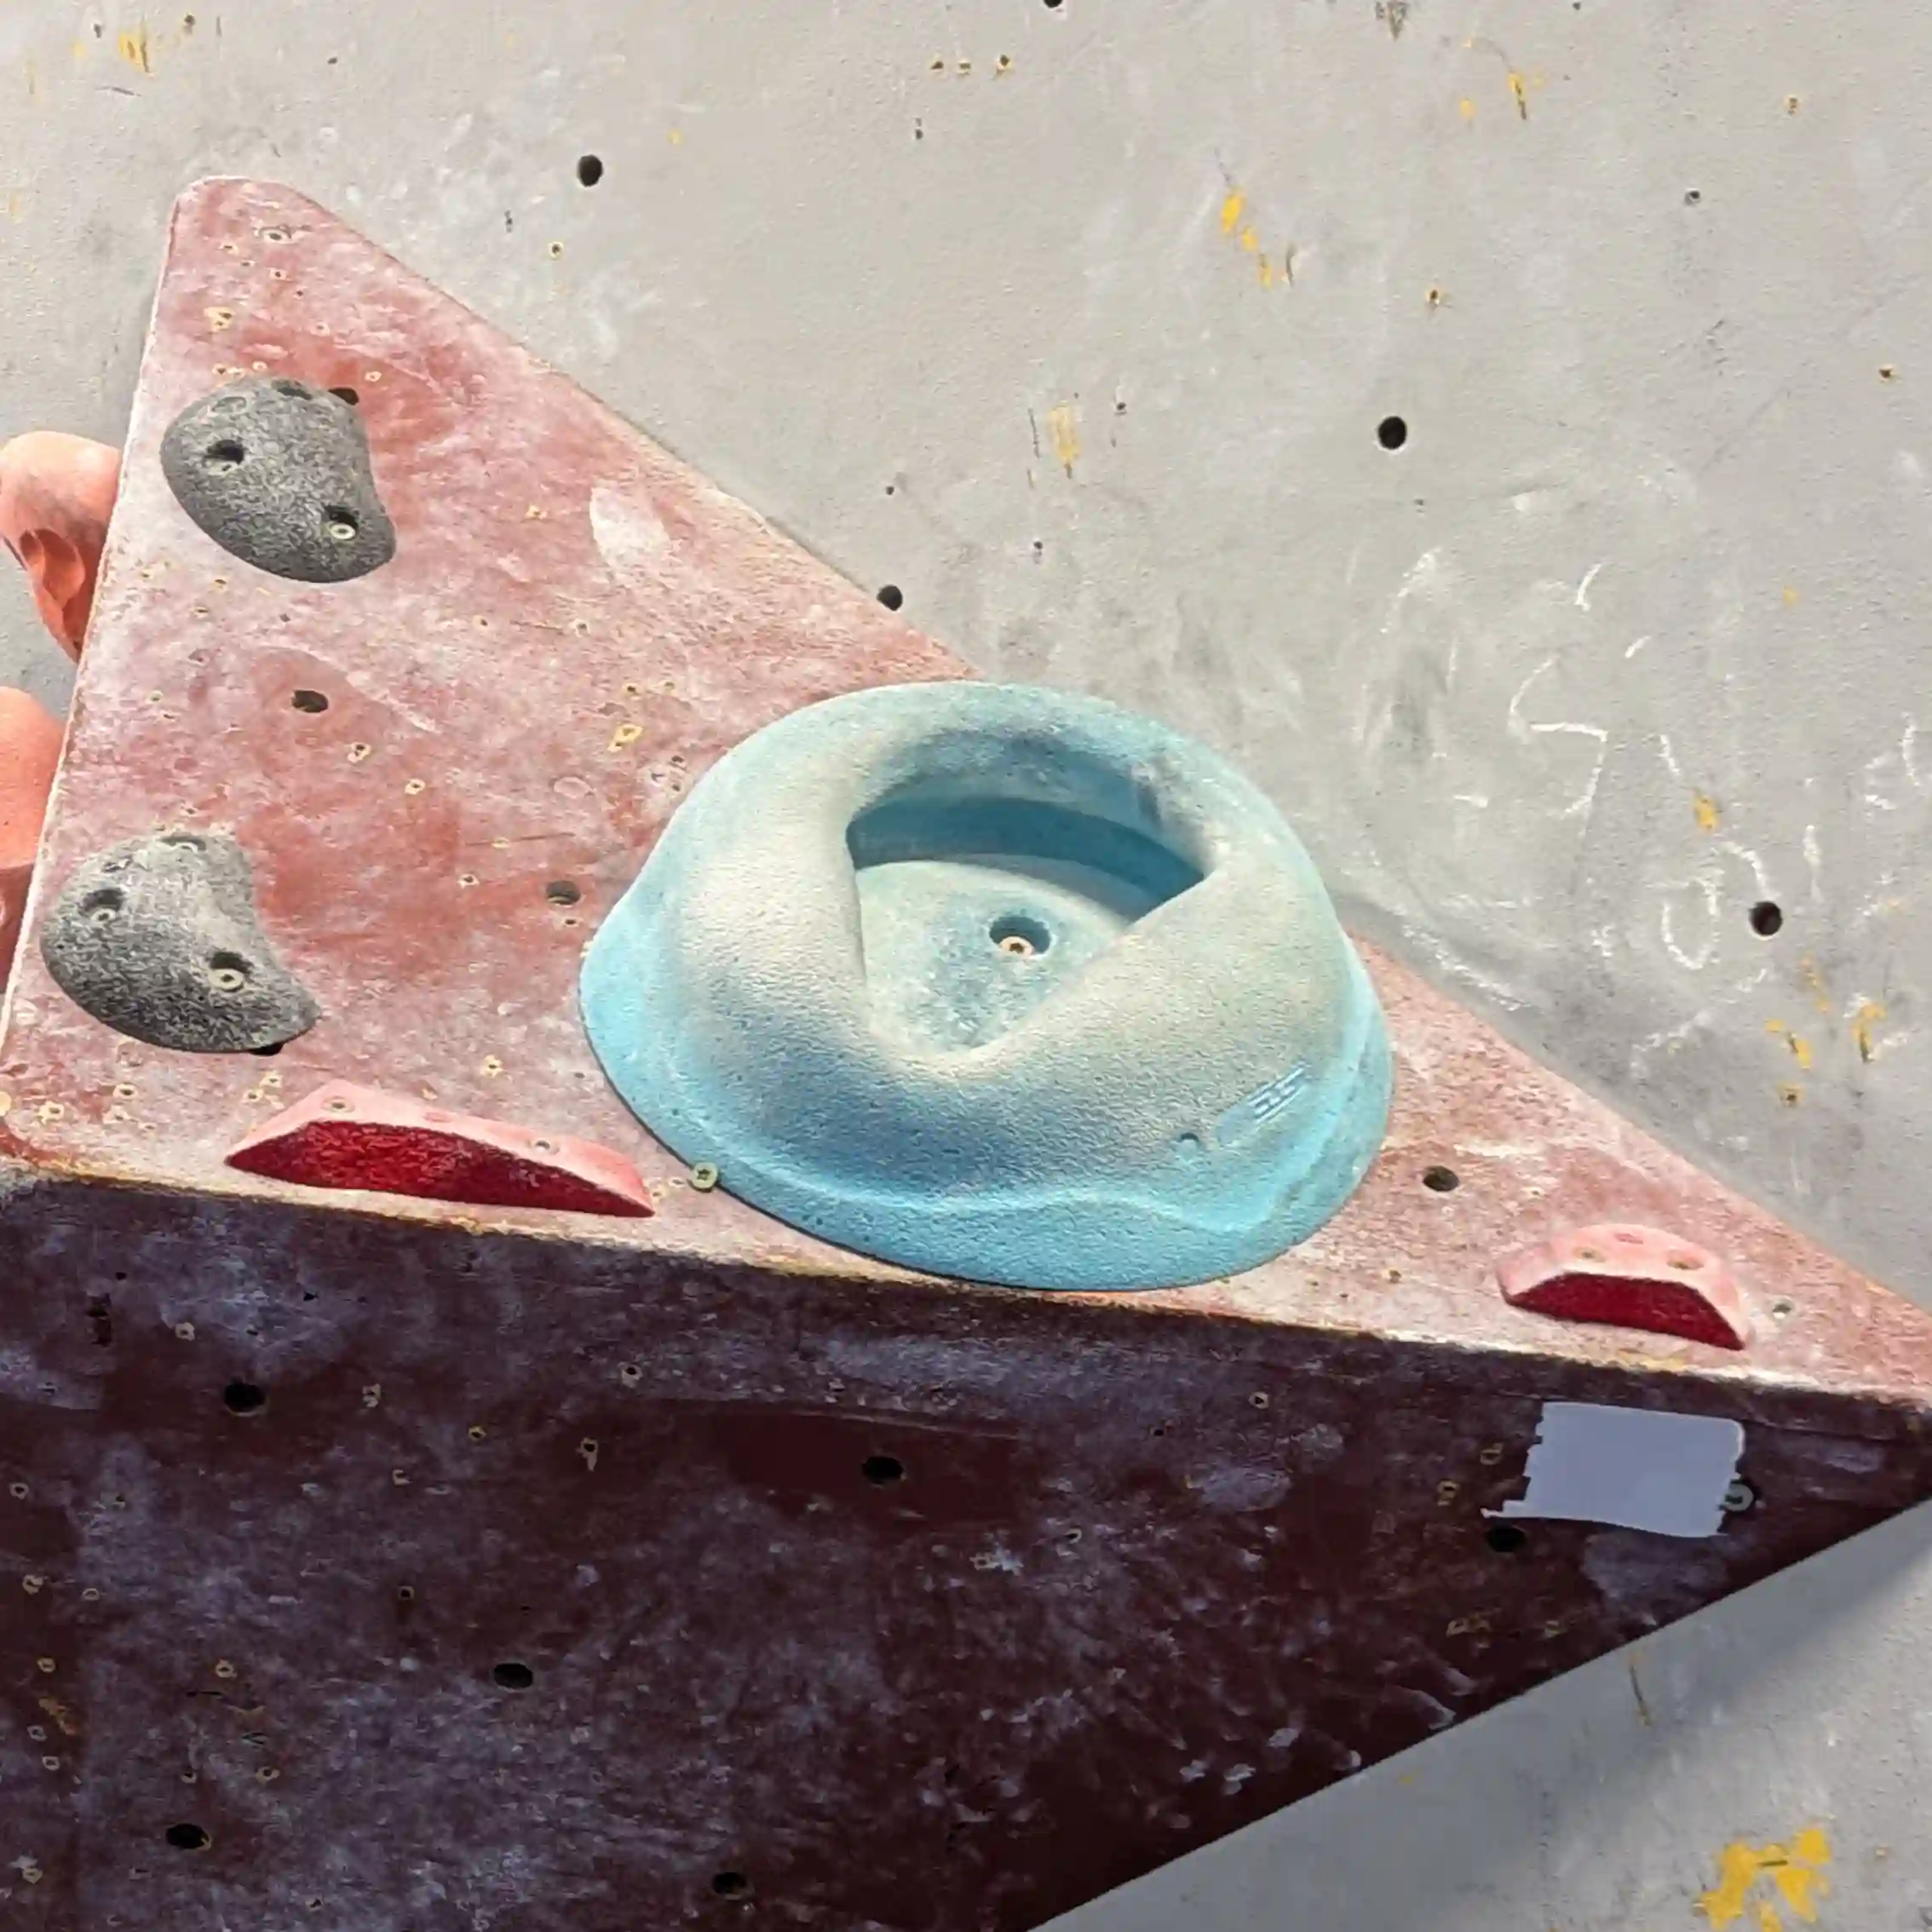
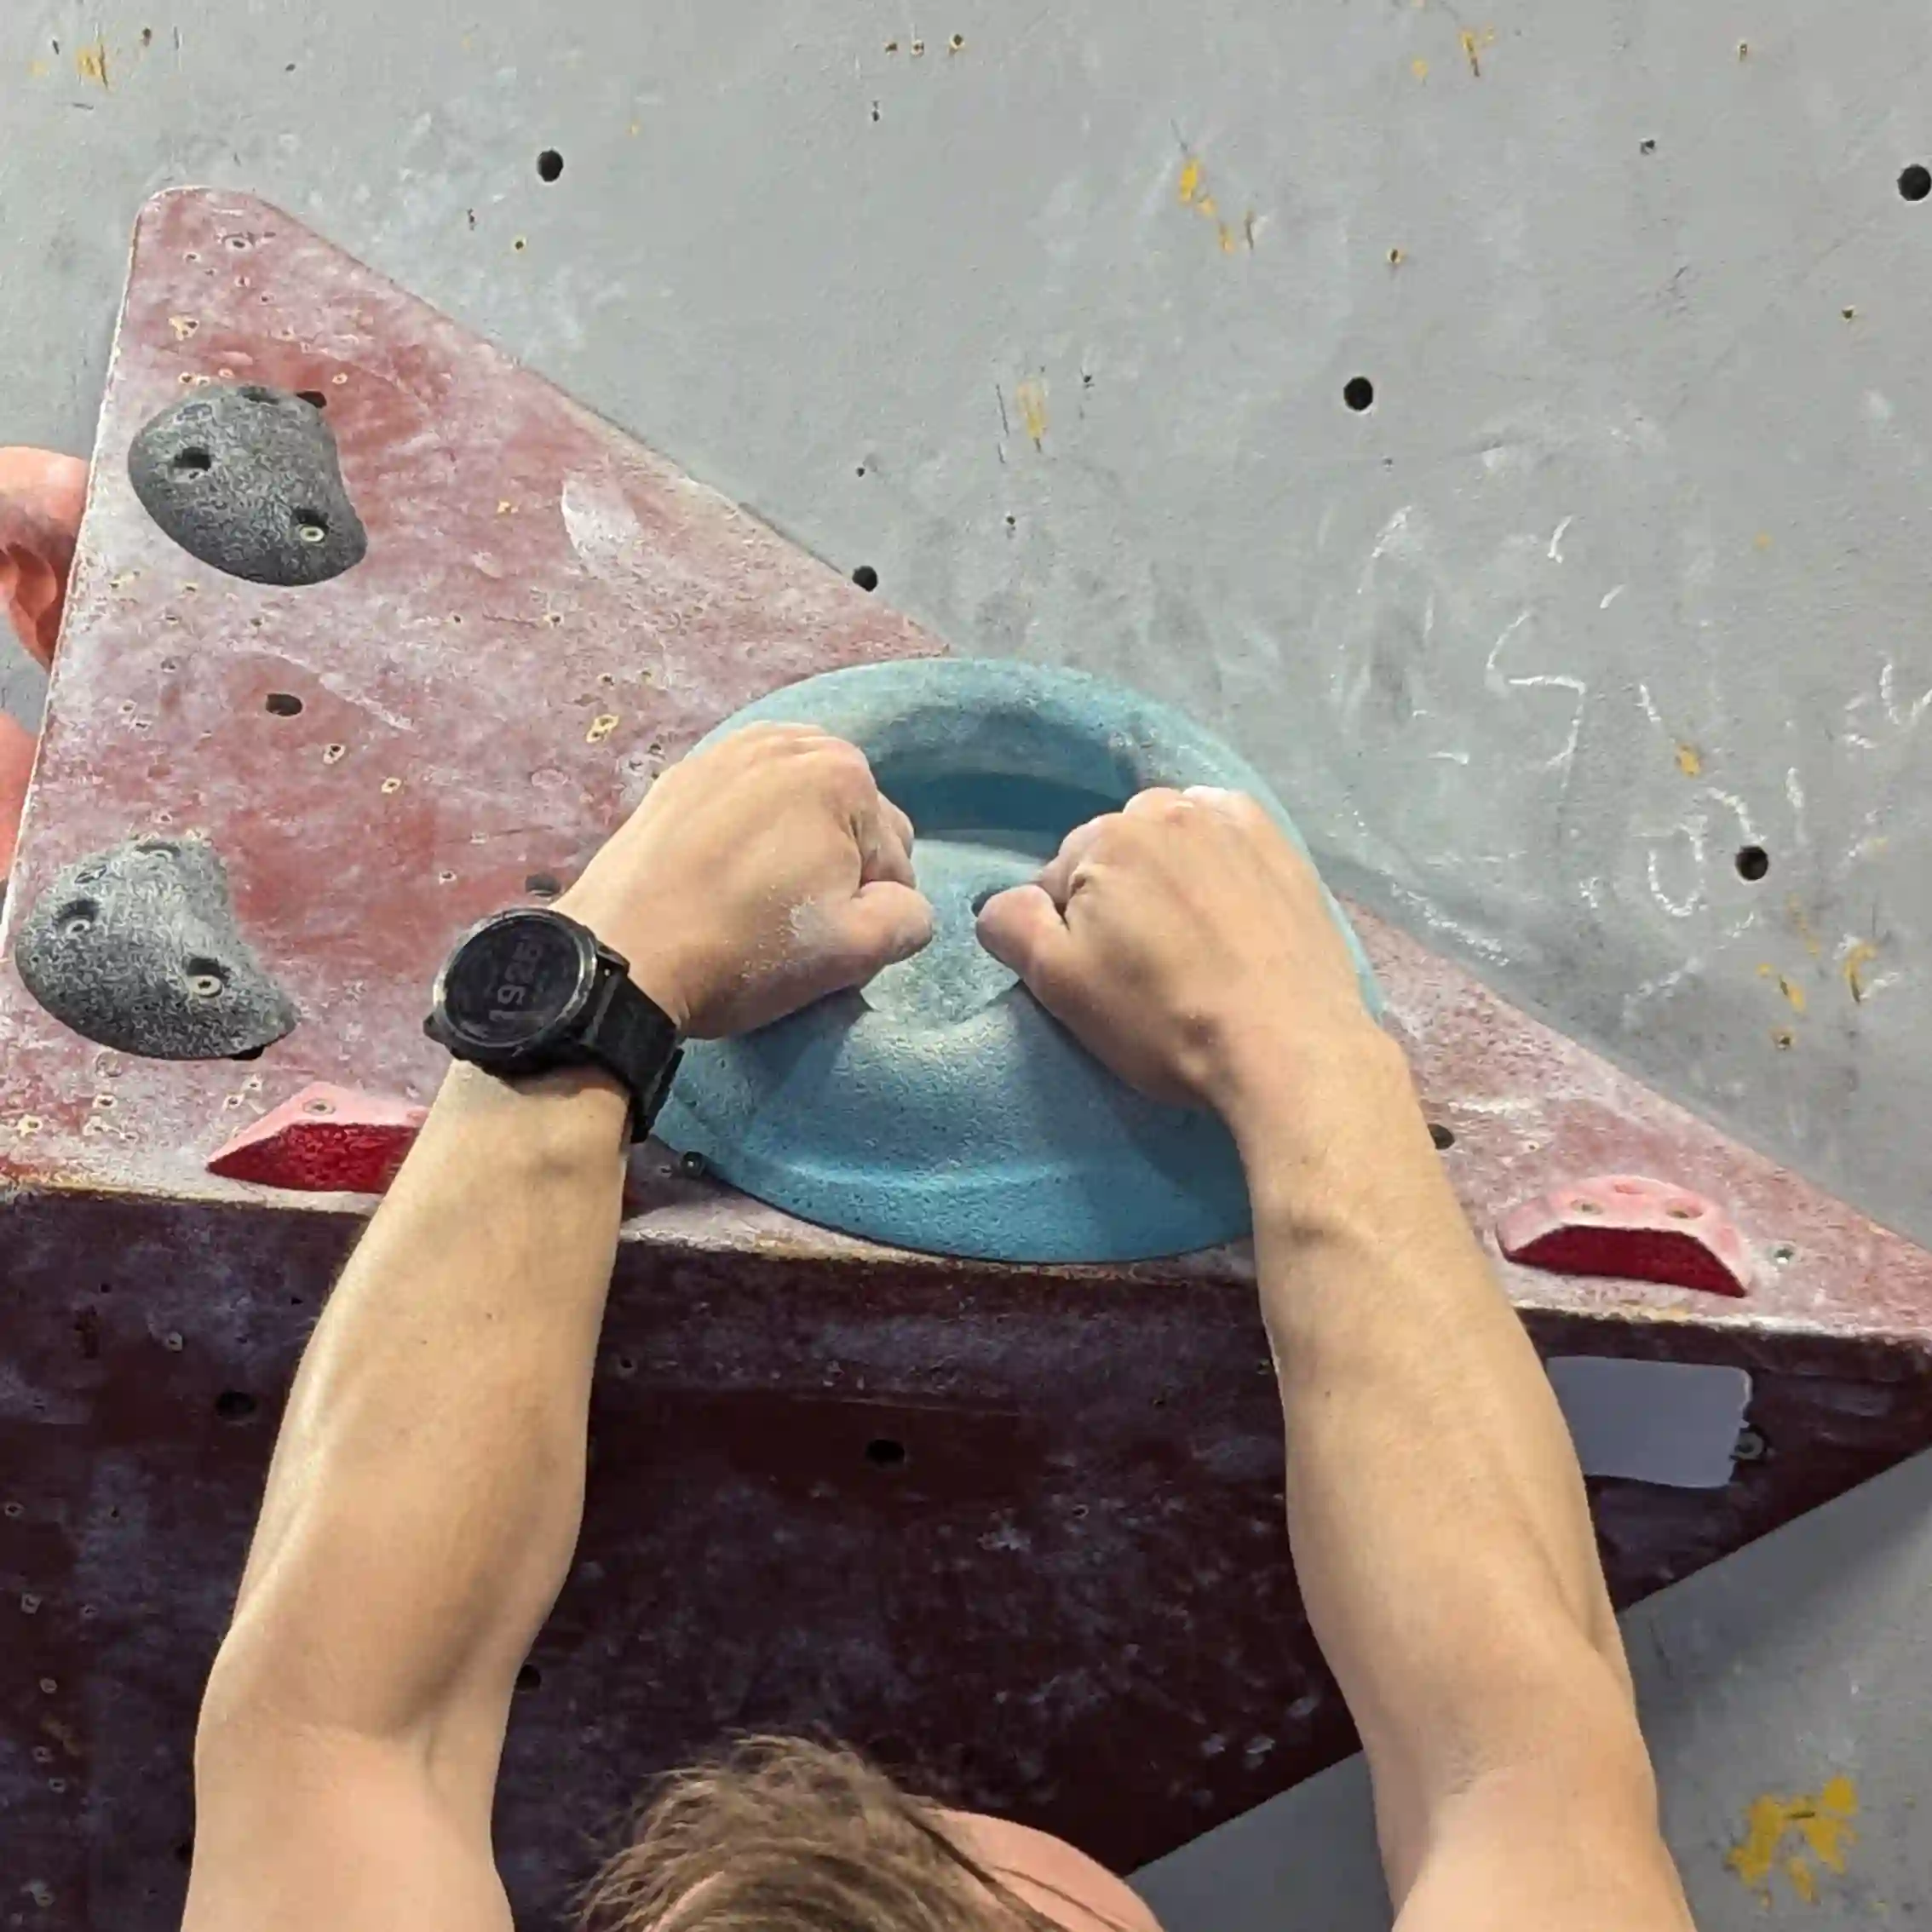
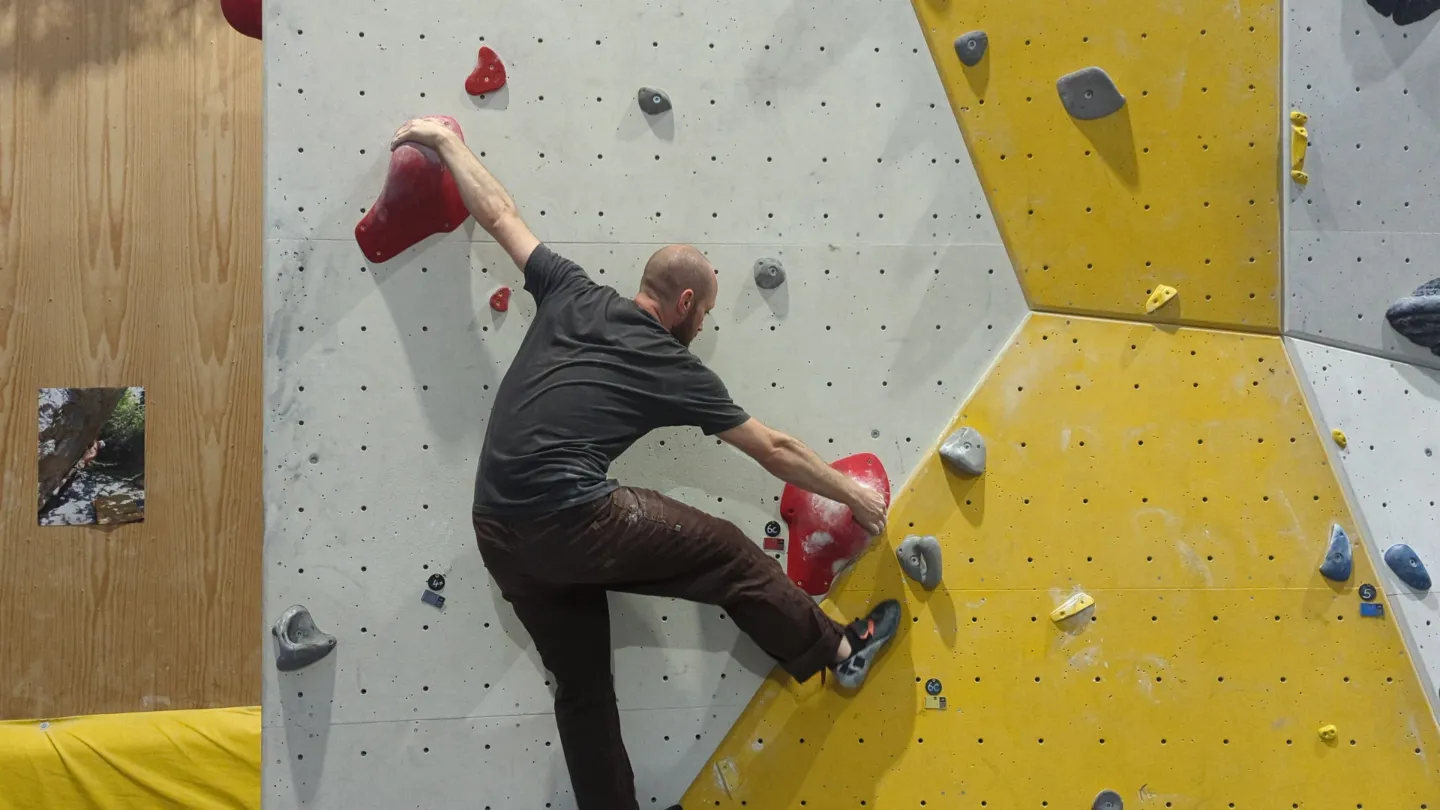
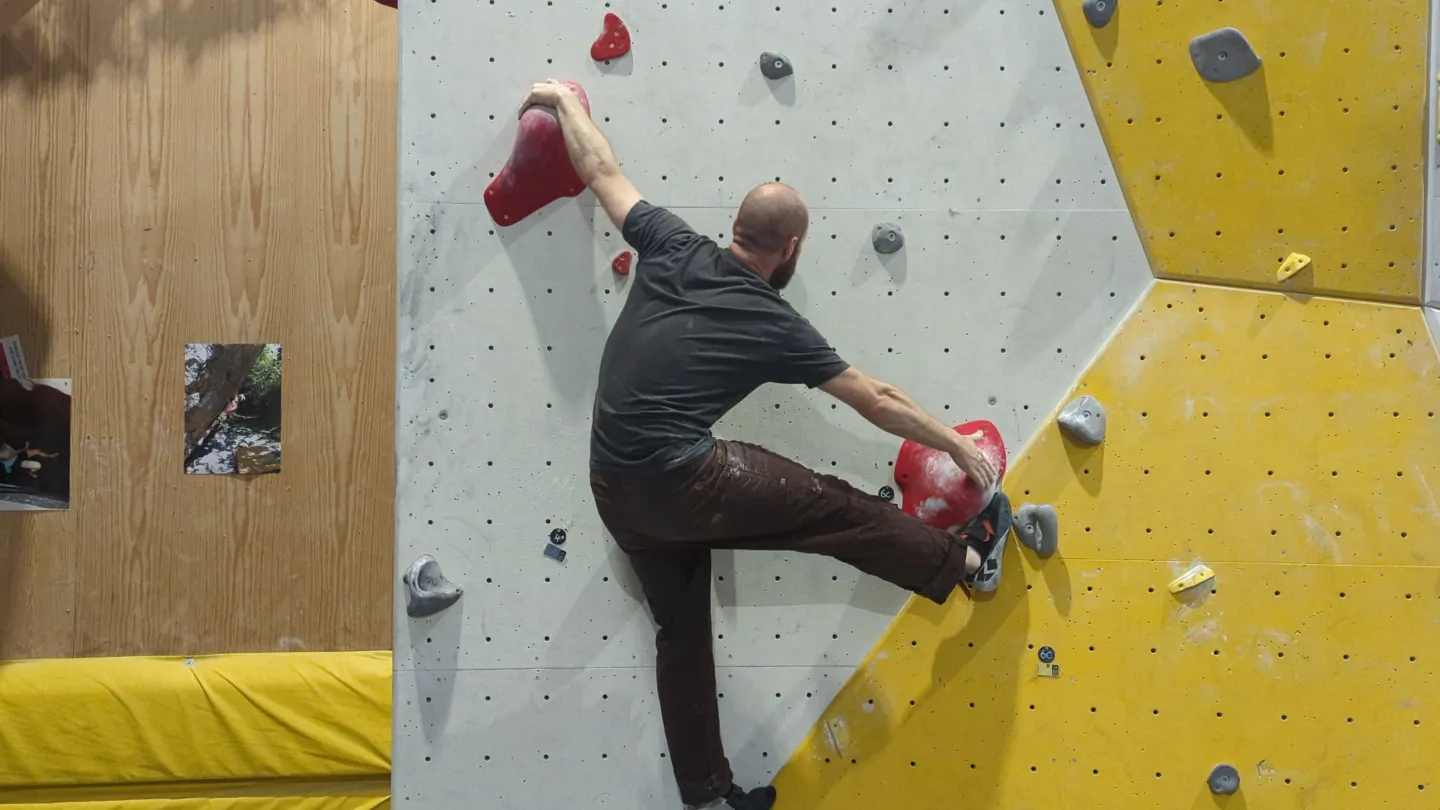
Gastons
A gaston is a technique where instead of placing your hand on a hold and pulling down on it, you pull in the direction of your hand. Best way to describe it, is to imagine you are trying to pry open an elevator door. Palms facing the wall and your thumbs are pointing down. You are pulling outwards. The technique was named after Gaston Rébuffat, what a guy!
Gastons come in handy when there isn't a hold that you can pull up onto nearby. Instead if there are holds to the side you can use the gaston technique to create tension which holds your body in towards the wall, allowing you to get into a better position to reach the next hold. They require varying degrees of back and shoulder strength to execute properly.
To identify where you might use the gaston technique, look for holds or volumes that are opposite each other. It might even be a large, single hold like the one pictured below.